Want to enroll your entire team in one of our protective relaying online training courses quickly and easily?
With our newly added features, you can:
- Purchase multiple seats for any combination of our online training programs
- Automatically receive bulk discounts
- Add more seats to your group at any time
- Add more courses to your group at any time
- Use your personal course management page to:
- Add individual Team Members to courses with their name and email address
- Upload a simple CSV file to enroll them all in one step
- Keep track of your team’s progress as they work through the process
- Get completion certificates automatically emailed to you and other Group Leaders when a student earns their continuing education credits.
Your Team Members can start immediately after they receive an automatic email with their:
- Username,
- Password, and
- a link to their course(s)
You can watch videos explaining these topics by clicking on the Get Help link in the top or bottom menu bars, or click on any of the topics below to get detailed instructions that will help you manage your group:
How to Purchase Protective Relaying Online Training for Your Team
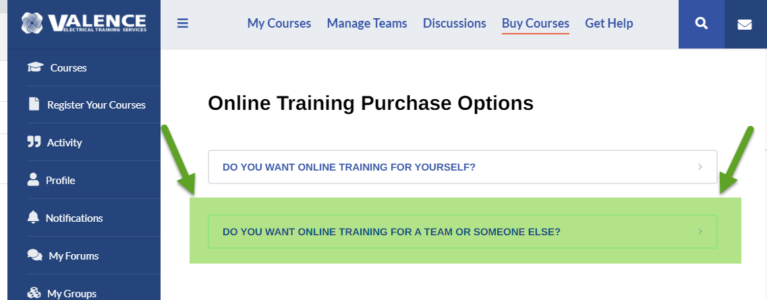
Click here to purchase your courses. https://valence.relaytraining.com/group-management-buy-courses/
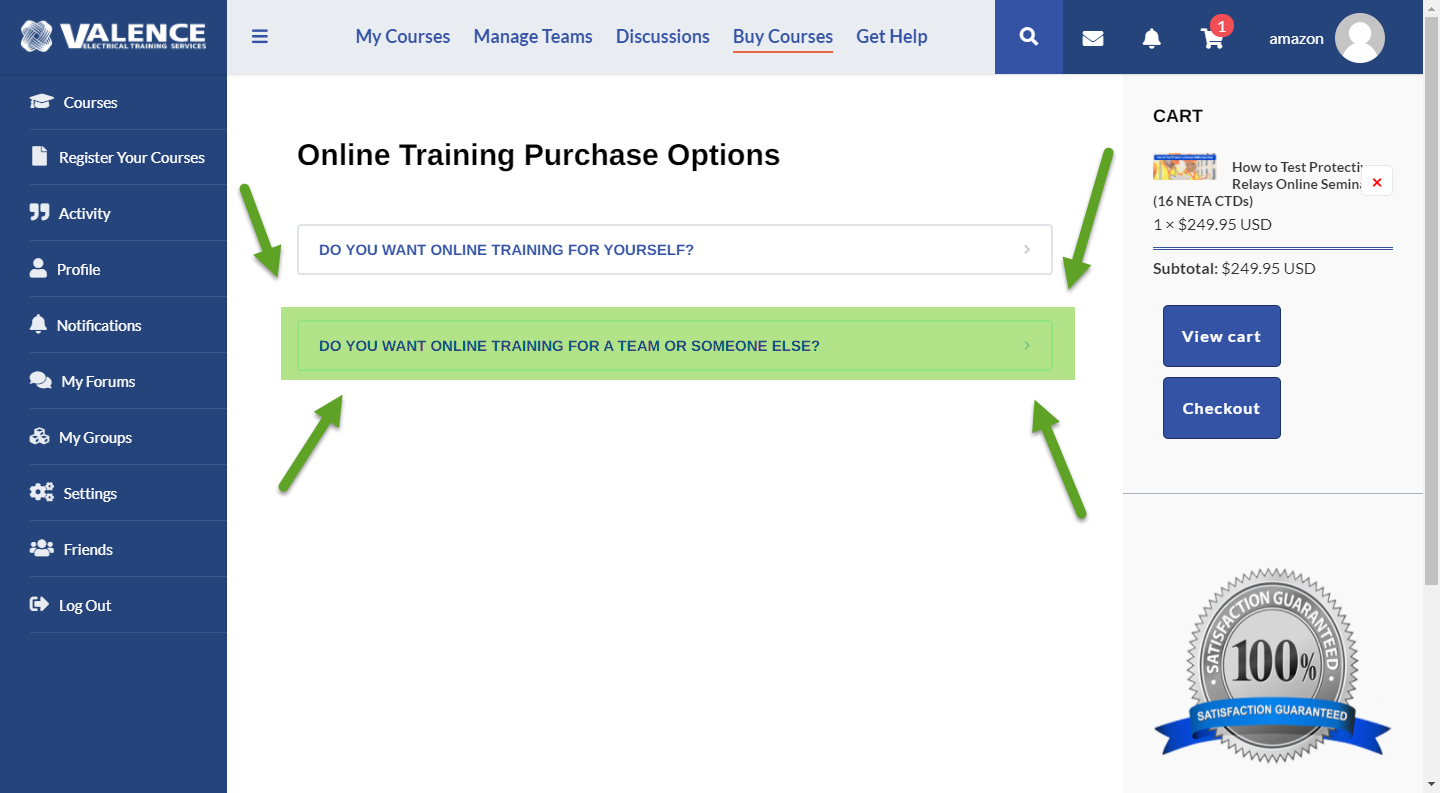
Click the “DO YOU WANT ONLINE TRAINING FOR A TEAM OR SOMEONE ELSE?” option on the page.
A group has three parts that are collected together under one name:
- A number of courses
- A number of students
- A number of managers
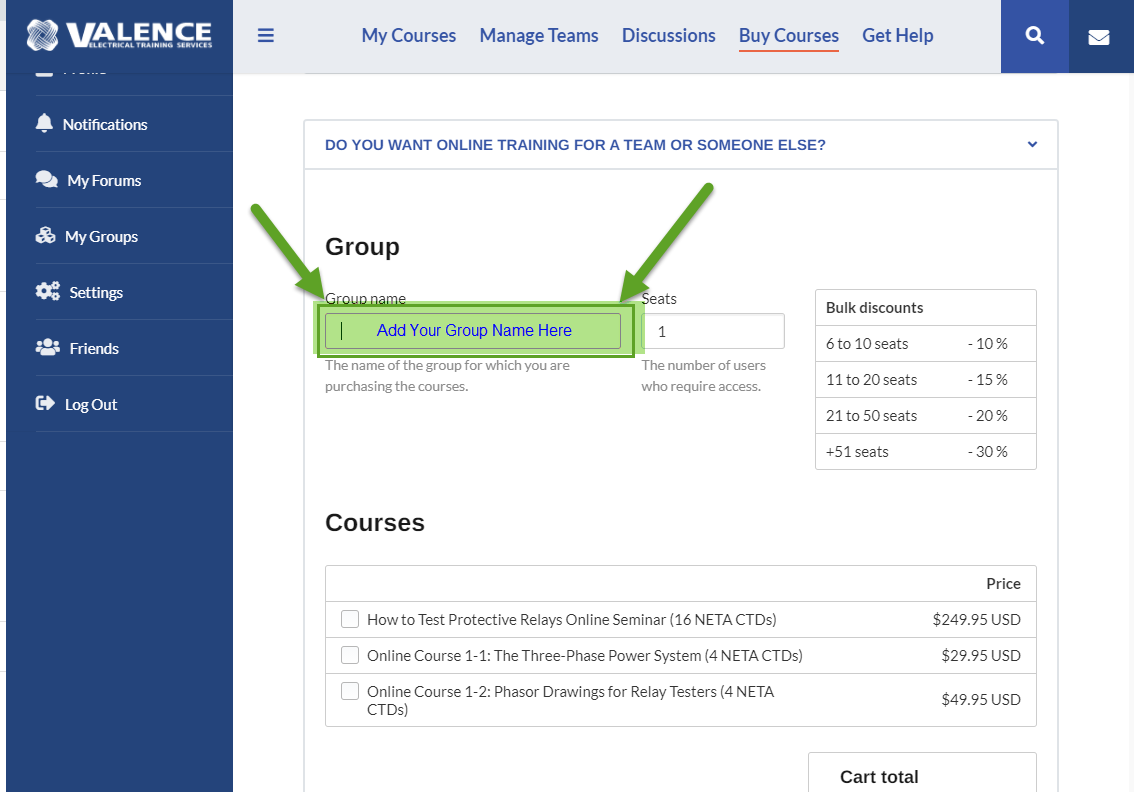
You first need to choose a group name that describes the three parts listed previously:
- If you plan on sending all of your team to the same courses and want to manage them from one screen, then you can create any Group Name that makes sense to you. Most people choose their company name.
- If you plan on mixing and matching different courses with different Team Members, then you should create a group name that has course details in it.
- If you want to group teams from different locations and keep the locations separate so that you can have different managers for different locations, then the Group Name should be based on the locations.
- You can mix and match the last two choices to create a group name that lists the courses and locations.
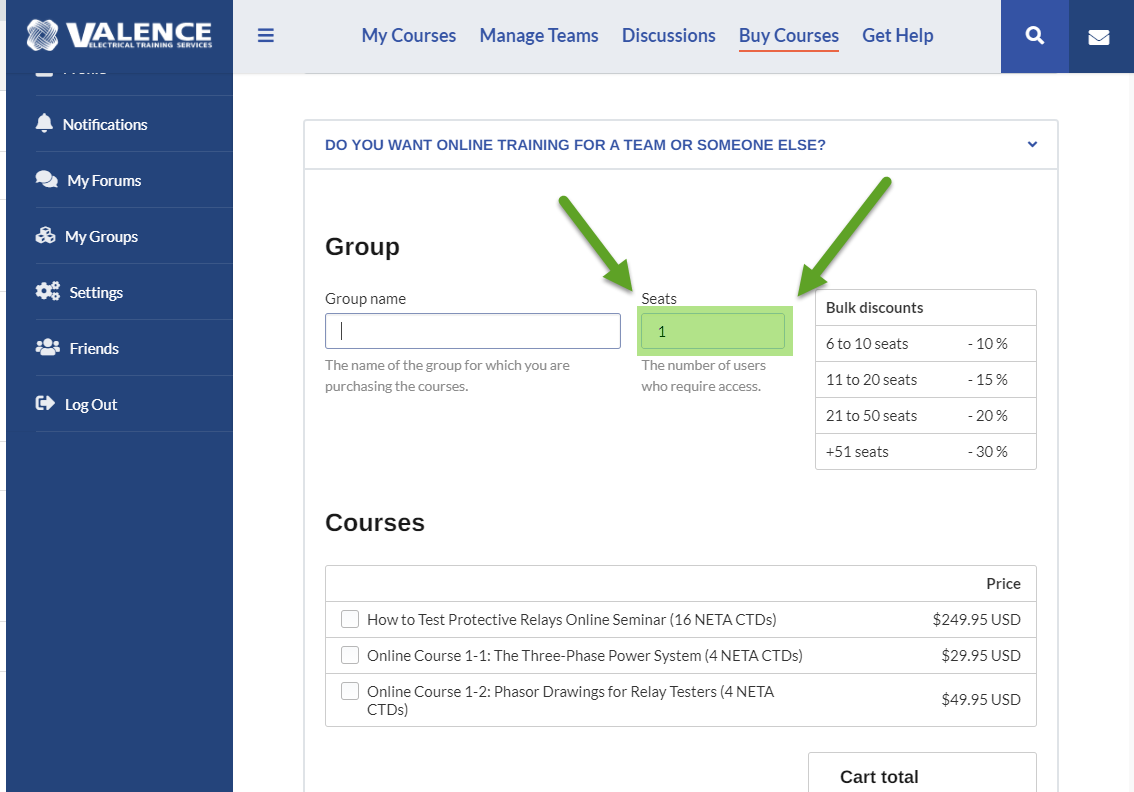
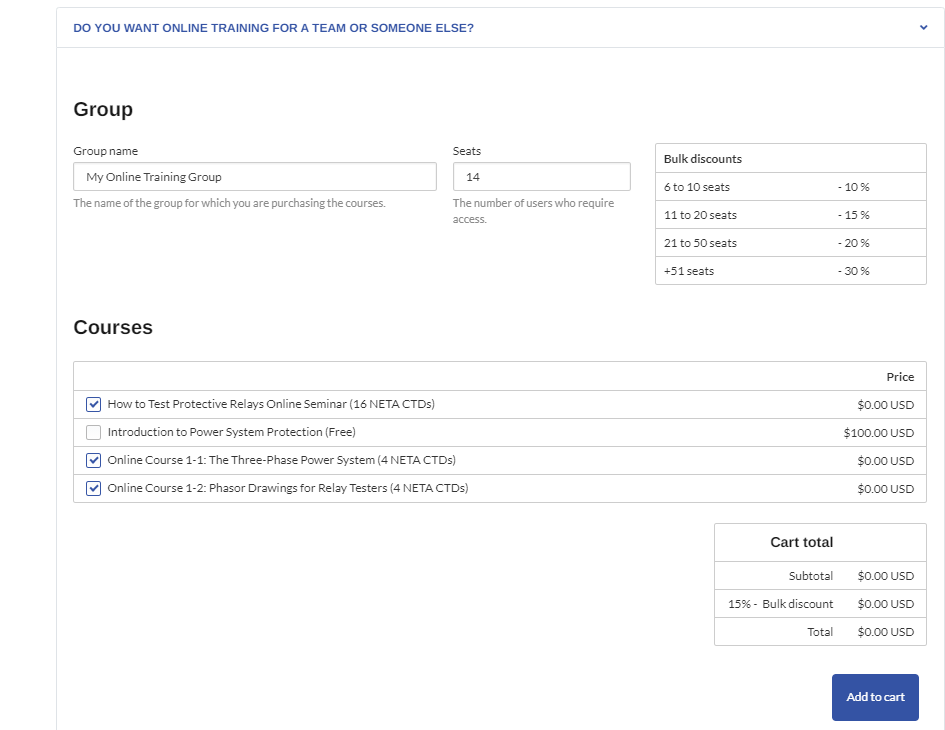
Then you need to choose the number of seats, or students, you wish to enroll in the group. Each seat can be filled with an individual who can take the course. You can add more seats to your group in the future. The Bulk discounts in the chart will automatically be applied based on the number of seats you choose.
Then you must choose the course, or courses you want to add to your group. You can add more courses to a group later, but you can never remove courses from the group. Choose the check box, or boxes, next to the courses) you wish to add.
We will always add an additional discount if you purchase all courses at once. There may be different discounts depending on course combinations in the future. All additional discounts will be listed below the “Add to cart” button and will be applied to your cart on the next screen.
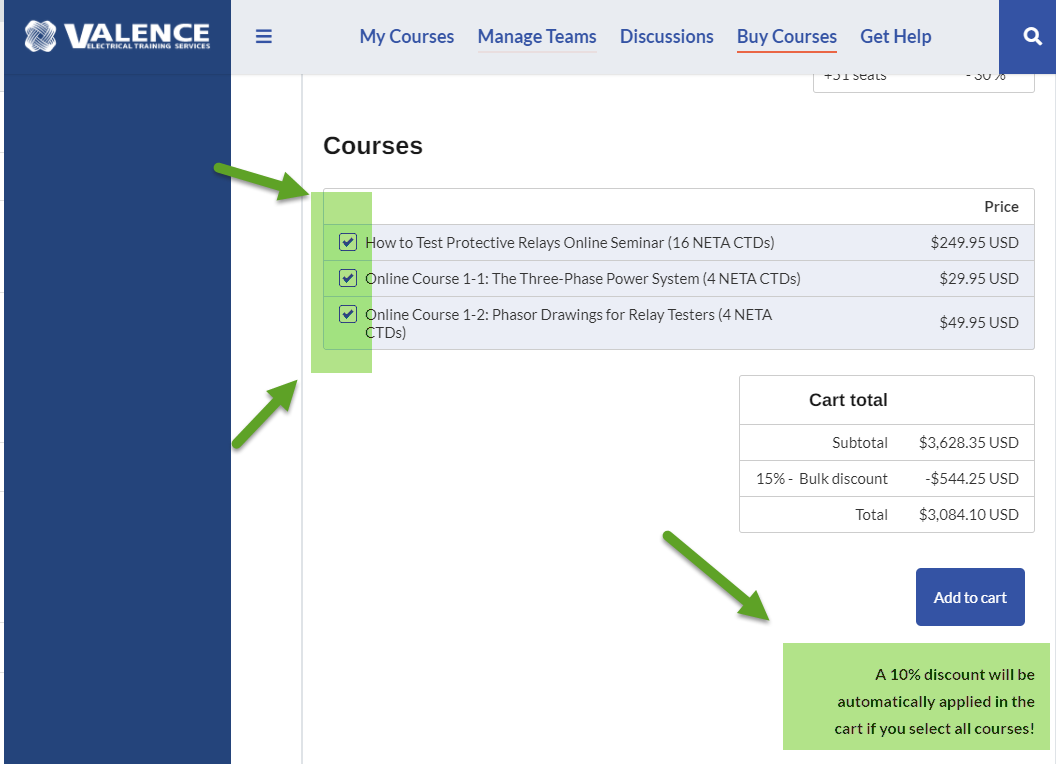
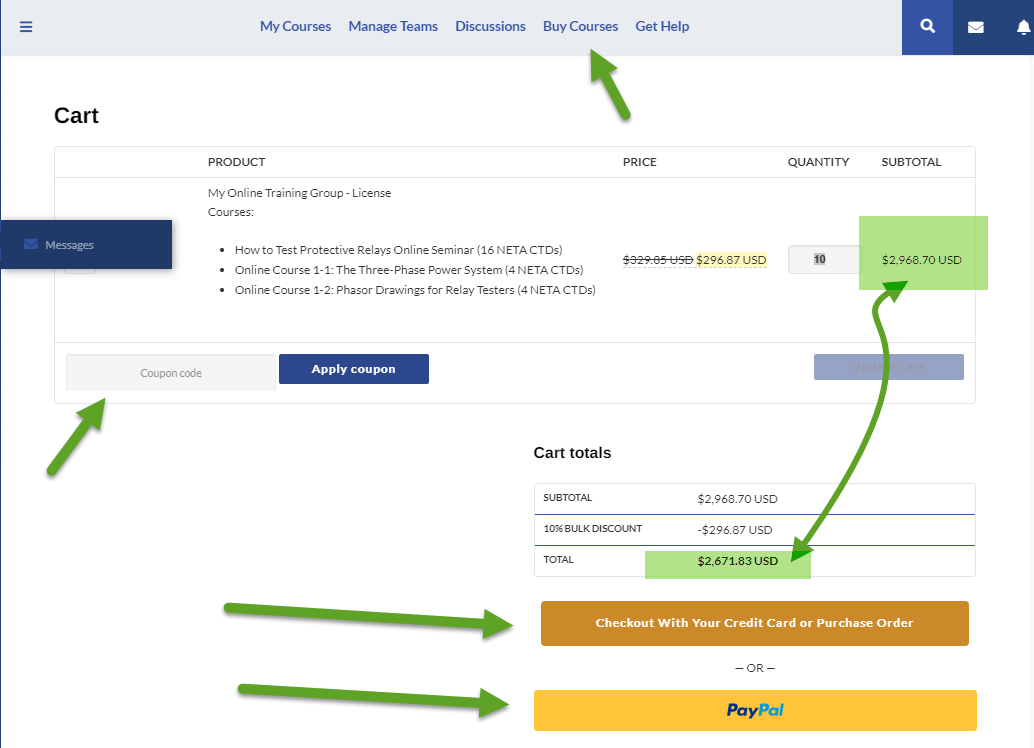
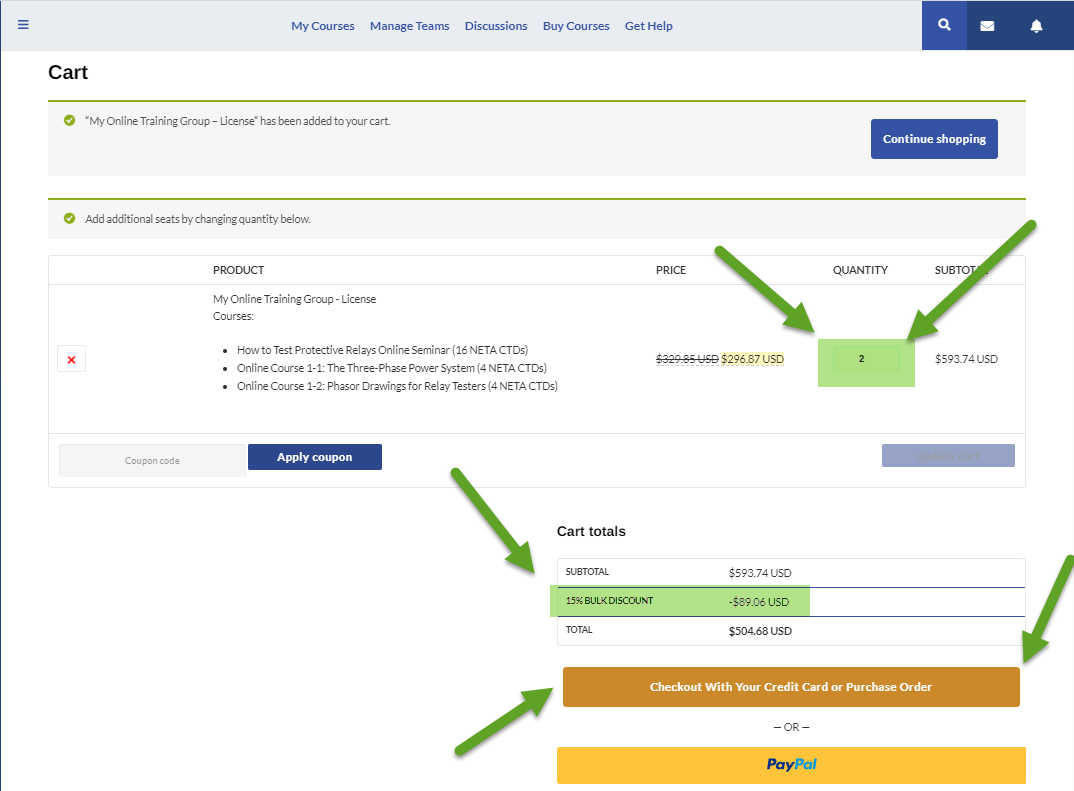
Click the “Add to cart” button to create your custom group. You will be taken to the shopping cart screen. Notice in the image below that an additional 10% discount has automatically been applied because all courses were selected.
The system will only allow you to purchase one group at a time. If you want to purchase another group for another location or create a different combination of courses for different students, you must complete this procedure and start from the beginning again for each group.
If you have a coupon code, you can enter it on this page and click “Apply coupon”.
You can change the number of seats here, if you wish.
Click the orange “Checkout With Your Credit Card or Purchase Order” button if you wish to:
- Pay with a credit card payment through our credit card processor (Stripe) with Visa, Mastercard, American Express, Discover, Debit. We do not have access to your credit card information and cannot accept payment over the phone.
- Pay with purchase order.
- Get an official quote.
Click the “PayPal” button if you wish to use Paypal
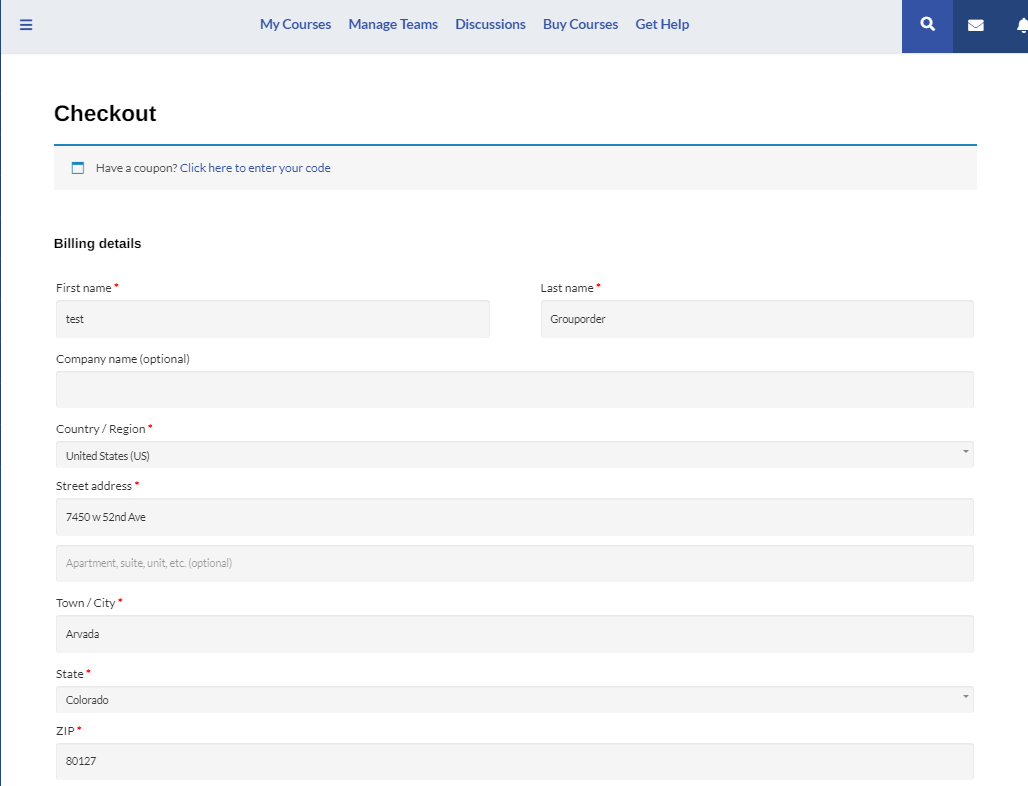
If you chose to click the first button, enter your information as you would any other online store:
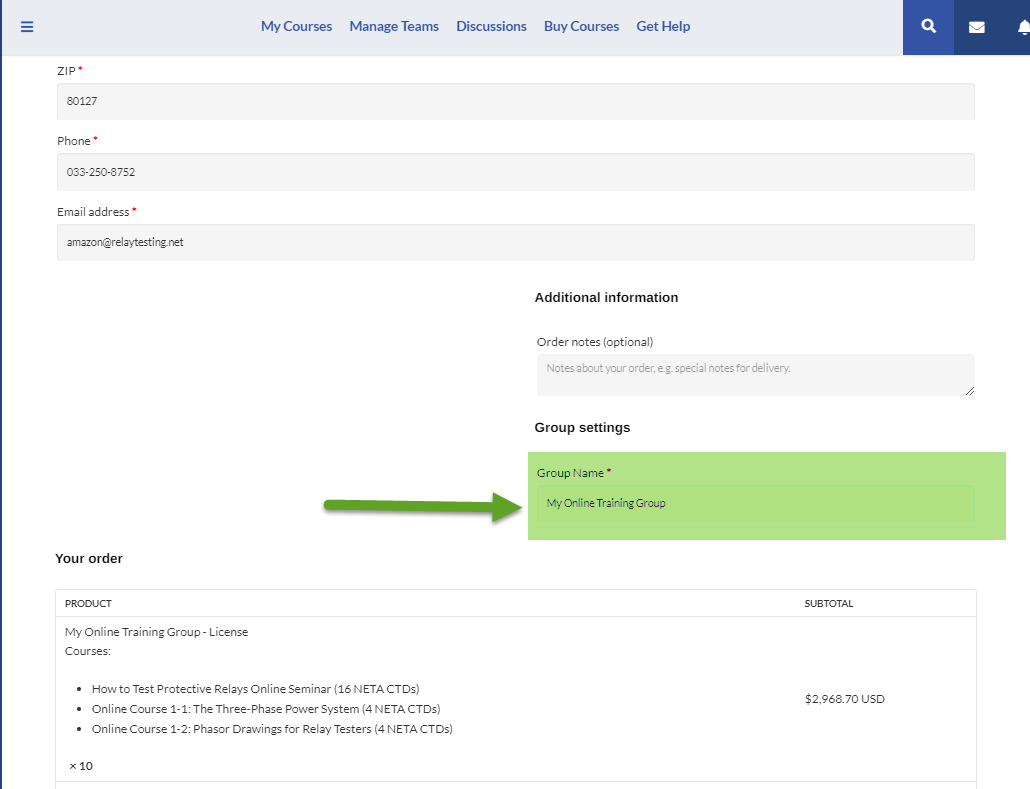
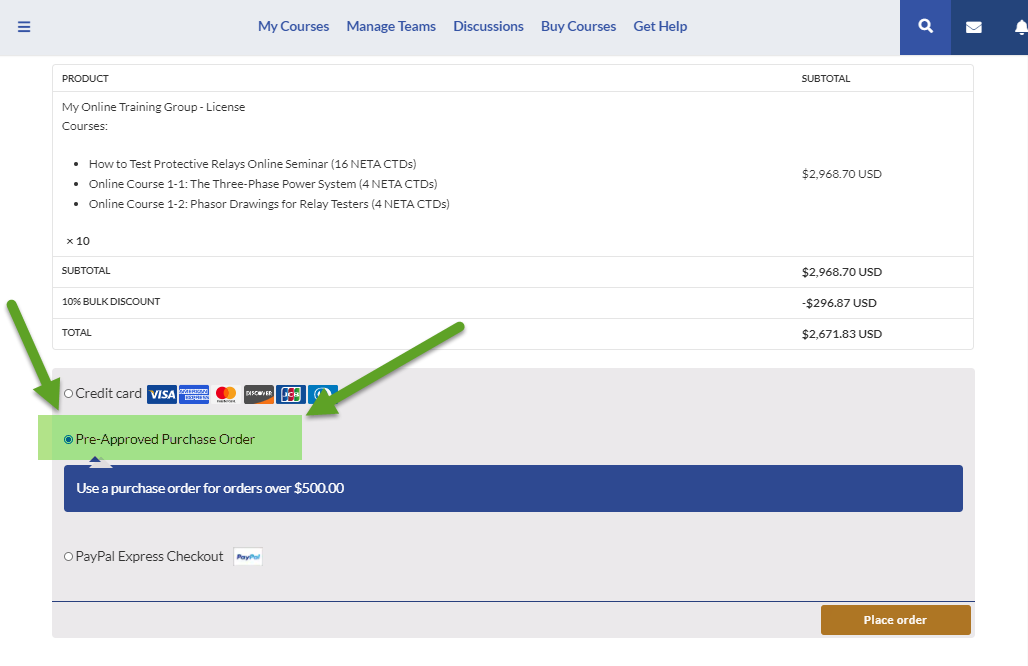
You have one last chance to change the Group Name on this screen, or add notes, instructions, or purchase order numbers to the order in the “Order notes (optional)” field. :
If you are paying by credit card, enter your credit card information and click “Place order”. You will have instantaneous access to your group and can start assigning Team Members to courses right away.
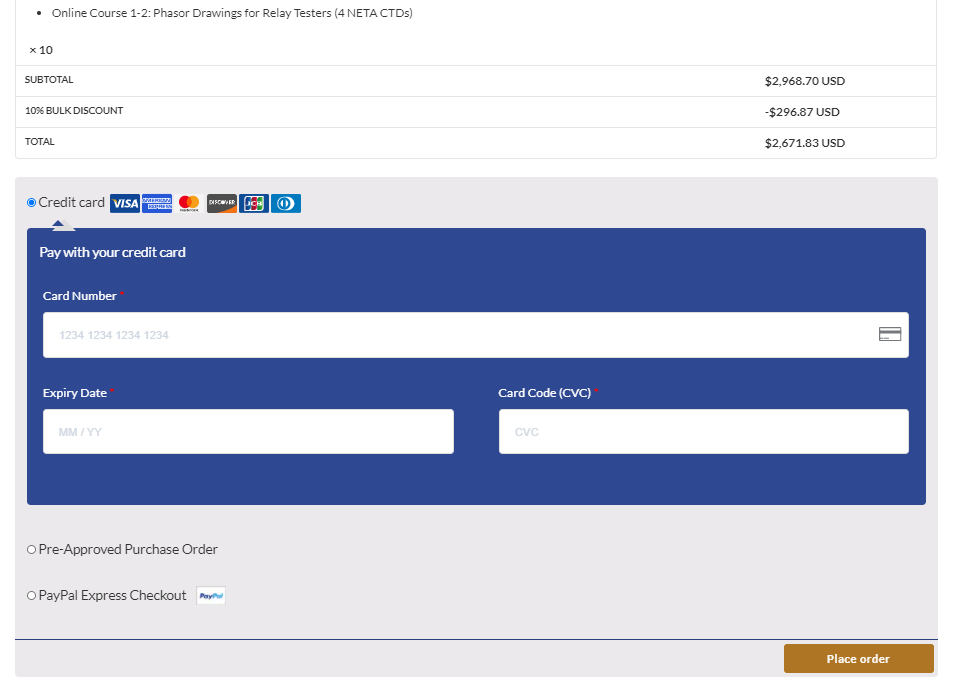
If you want to pay with a purchase order or get an official quote, select the “Pre-Approved Purchase Order” option and click “Place order”. You will not get immediate access to your courses with this option, so it does not need to be pre-approved. (We added that language to scare the scammers away.)
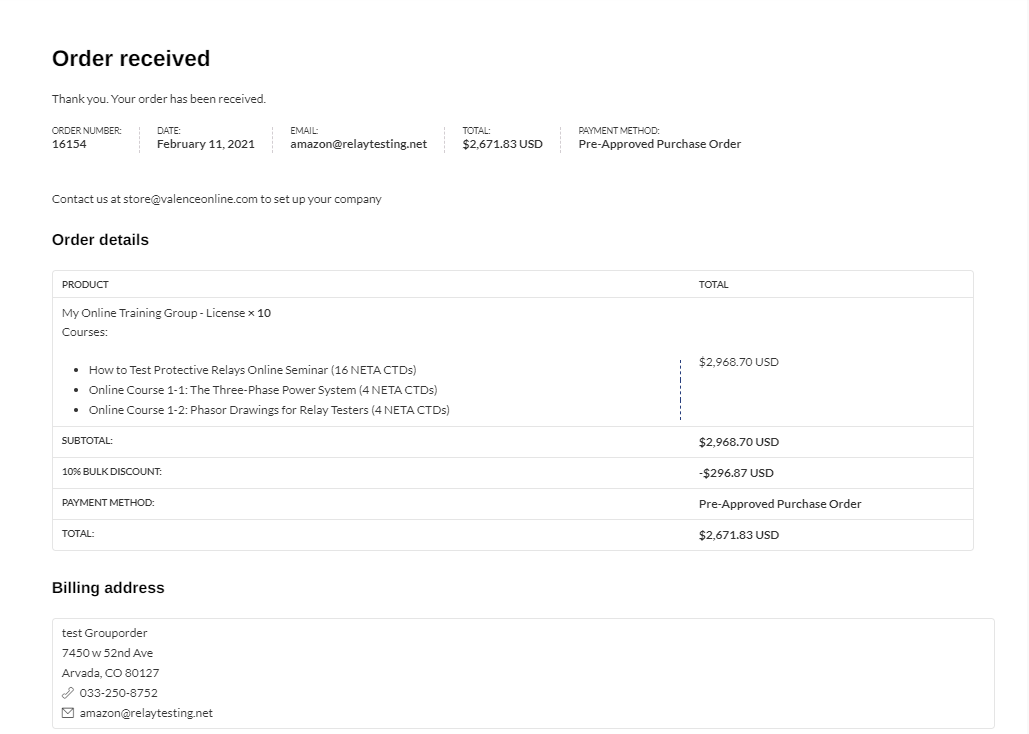
You will be redirected to the following “Order Received” page after you click the “Place Order” button.
If you want to create another group, click the “Buy Courses” selection in the top or bottom menus.
If you paid with a credit card, you can start managing your group immediately by using the “Manage Teams” link in the top and bottom menus.
If you were looking for an official quote, you can print this page and use it as your official quote.
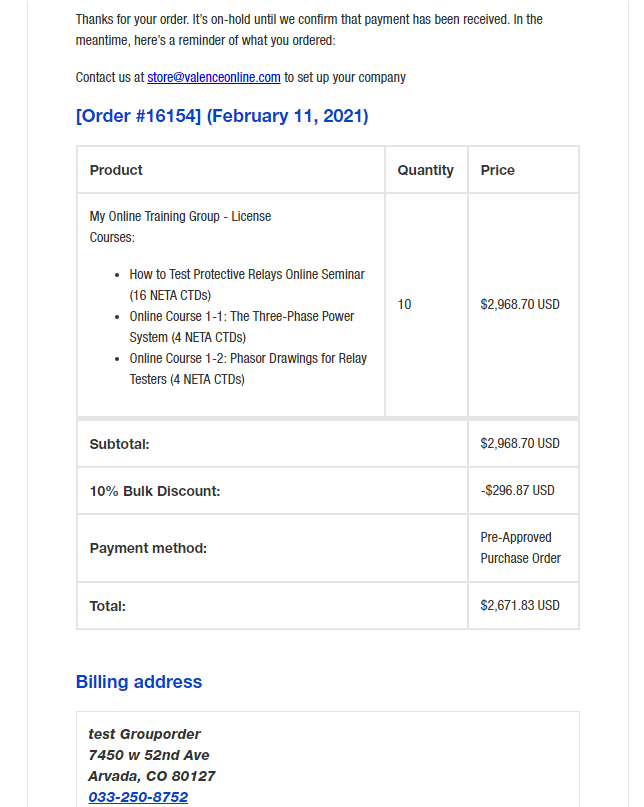
Or you can use the email that will be sent to your email address:
If you have a purchase order, contact us at store@relaytraining.com with the order number and purchase order and we will manually process your order. You will get access to your groups once the PO is approved.
Your receipt/invoice will arrive via email once the order is paid for by credit card or approved purchase order. You can print the email for your records:
Or you can open the attached pdf for your records.

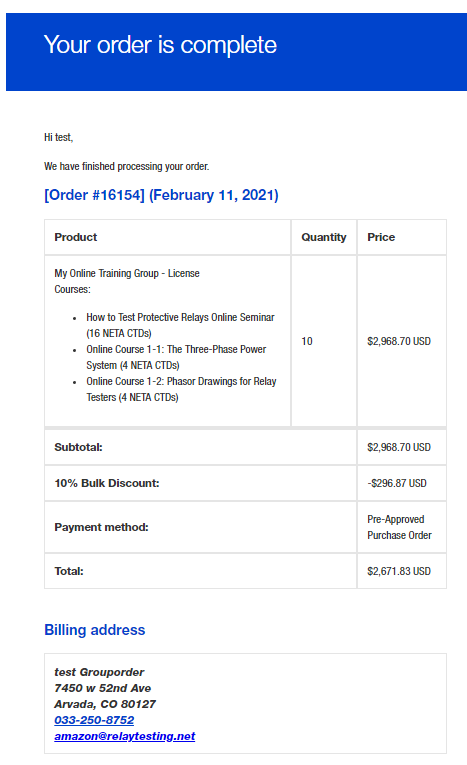
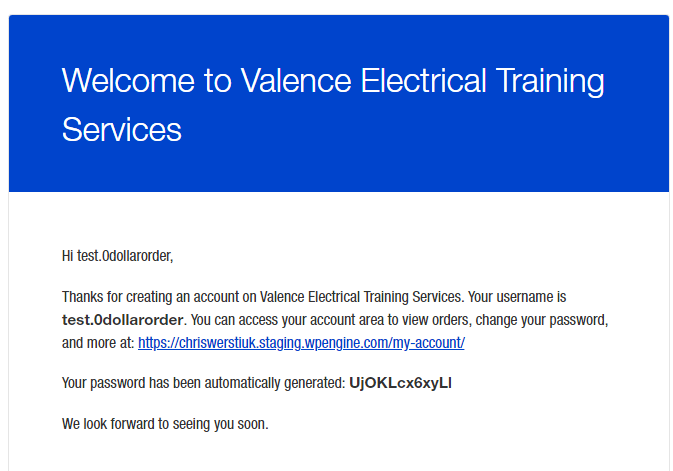
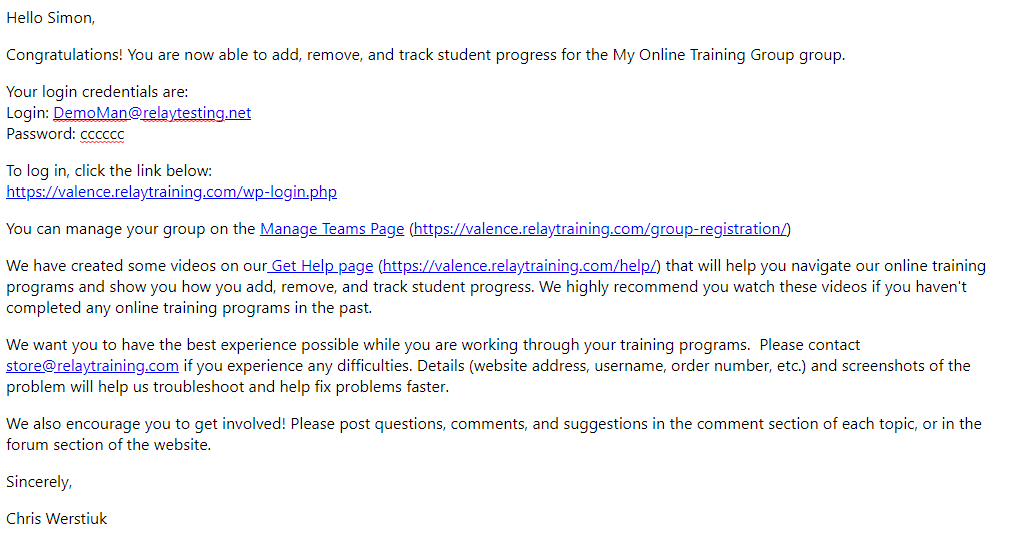
You should also receive an email with some helpful hints to access your account:

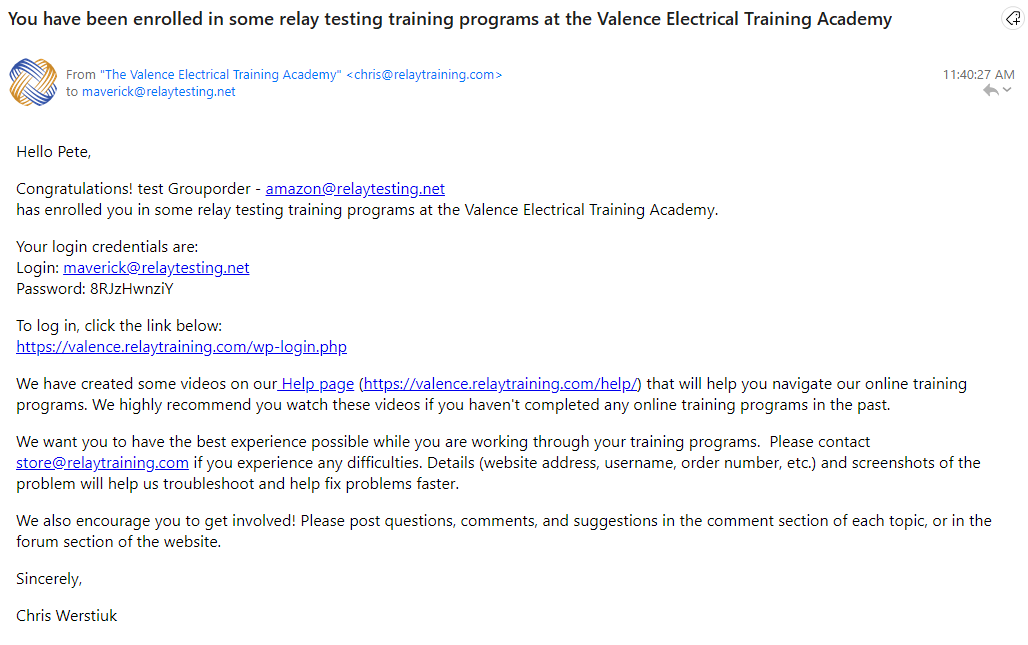
And another one with your user name and password:
You can manage your team as described in the following sections once your order is complete and your payment is approved.
How to Add Users to Your Groups
You must be logged in to manage your team’s online training programs. If you are not logged in already, click the Login link, enter your user name and password, and then go to the Manage Teams menu. You can also reset your password from the login page.
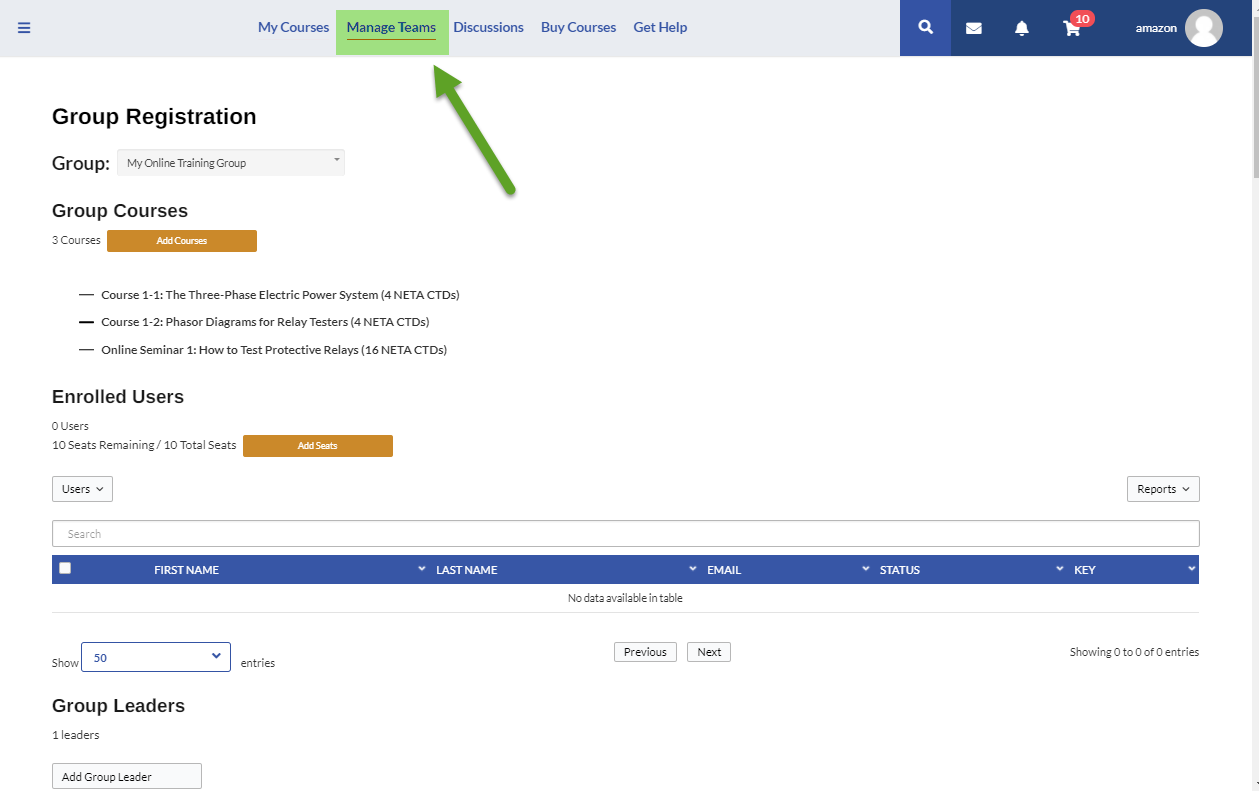
If you are logged in, your Group Registration page should look like this:
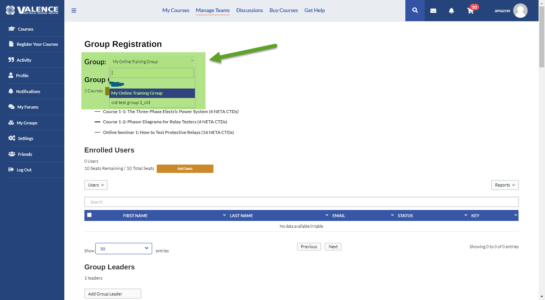
If you are assigned as the Group Leader to multiple groups, there will be a “Group” pulldown list. Always make sure you have the correct group selected before working on any group management page. It resets on every new page.
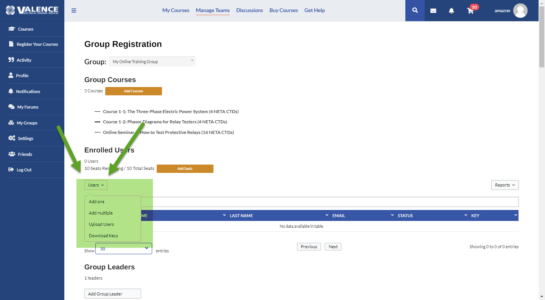
You can start enrolling your Team Members into courses by selecting the “Users” drop-down menu:
You can add one Team Member to the group by selecting “Add One”. A pop-up dialog box will appear. Enter the Team Member’s first name, last name, and email address in the form fields.
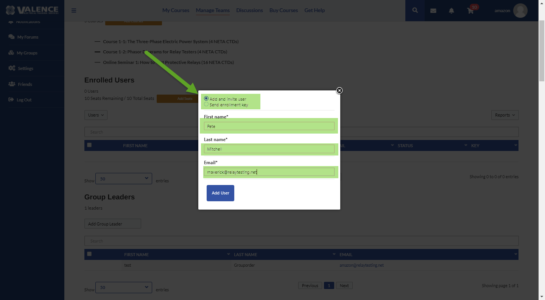
If you want Team Member(s) to be automatically enrolled with the information you provide, select “Add and invite user” and press “Add user”. They will be:
- Added to your group
- Enrolled in all the group courses
- Be sent an email with their login credentials and instructions
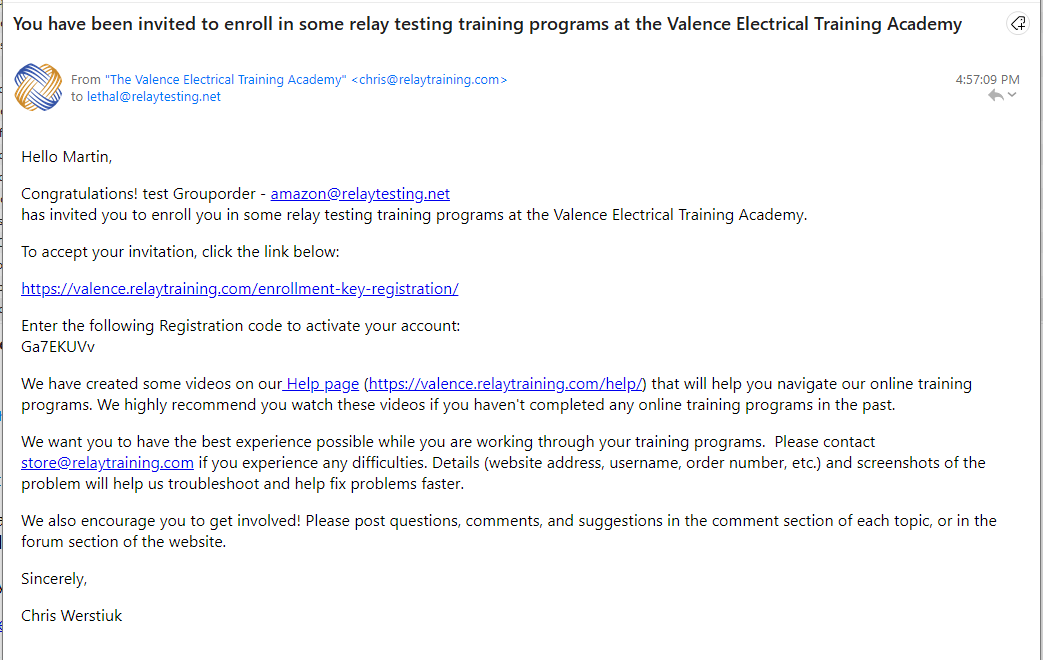
If you select the “Send Enrollment Key” option, the Team Members will be sent an invitation email and they can create their own account information. The information they enter will override the information you enter, so they can choose a different email address and name if you choose this option.
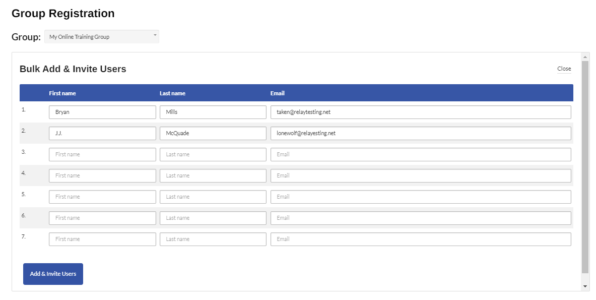
You can add more than Team Member at a time by selecting the “Add Multiple” choice in the “users” pull-down menu. A new form will appear with a blank row for each empty seat and you can enter the Team Members ‘information all at once. The users will receive an email with their login credentials with an explanation and be automatically enrolled into your group and courses.
You can also enroll your Team Members in bulk via csv by selecting the “Upload Users” option from the “Users” pulldown list. The first two options (“Add and Invite Users” & “Send Enrollment Keys”) will perform the functions described previously.
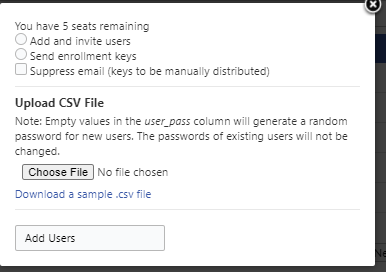
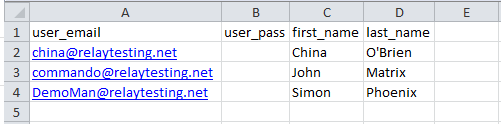
Start by downloading the “Download sample csv” file. Open the file and add the first name, last name, and email address in a separate row for each Team Member. Leave the “user_pass” cell blank if you want the passwords to be randomly generated for each user, or enter a user-specific password if you want to specify the user passwords. Remember to save your file.
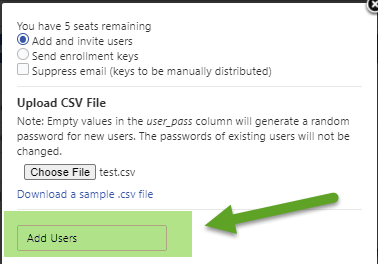
Click the “Choose File” button, select your newly created csv file, and then click “Add Users”.
A summary page will appear. Click “Done” if all the information is correct. If the “Suppress email (keys to be manually distributed)” checkbox has NOT been selected, the Team Members will be sent an email as described earlier. If the “Suppress email (keys to be manually distributed)” checkbox is selected, you will have to manually invite the users using the key beside their name. Unregistered Team Members can only register themselves on a hidden registration page. Be sure that their invitation includes this link https://valence.relaytraining.com/enrollment-key-registration/ and their Key when you invite them.
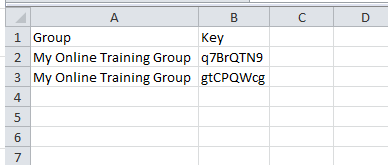
If you want to send your own email instructions for your remaining seats, you can choose the “Download Keys” option from the “Users” pull down list. Save the csv file when prompted, and open the file to see what keys are available for the remaining seats in your group. You can then send these keys to whomever you wish with your own instructions. Remember that unregistered Team Members can only register themselves on a hidden registration page. Be sure that their invitation includes this link https://valence.relaytraining.com/enrollment-key-registration/ and their Key when you invite them.
How to Remove Users From Your Group
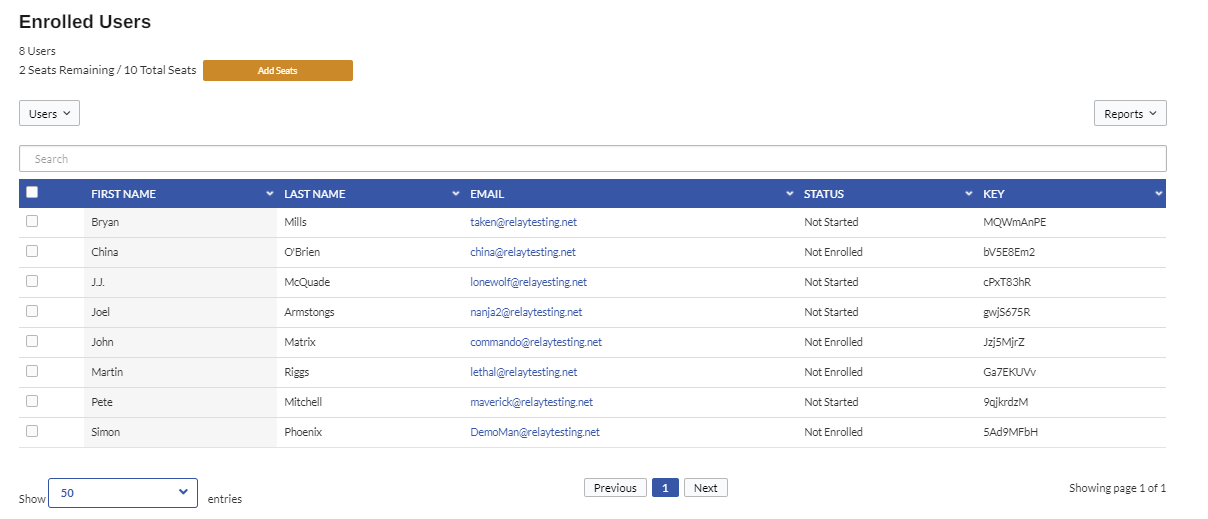
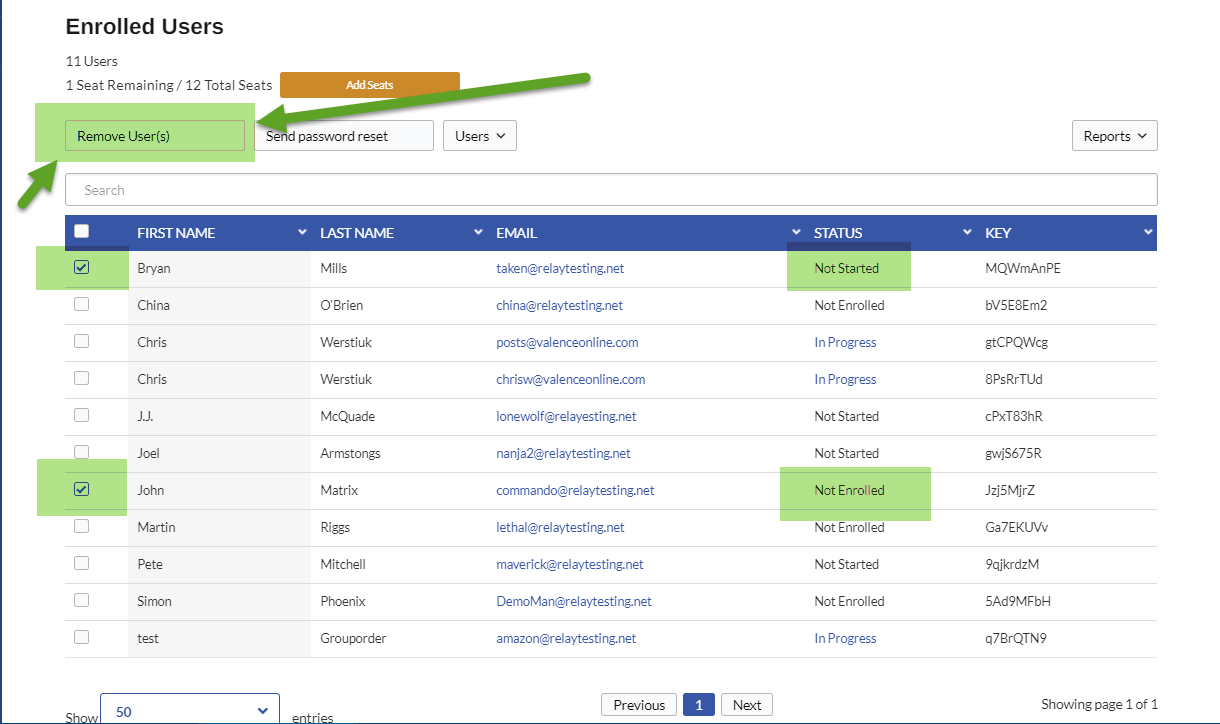
Our latest upgrades allow you to remove users from your group that have not started a training program. You can tell whether a user has started a training program by looking at the Status column in the Enrolled User list. If a Team Member’s status is anything except “In progress”, you can remove that user and get a seat credit for the group.
For example, the example group in the image below has 12 seats with one seat remaining. Bryan Mills’ status is “Not Started” and John Riggs’ status is Not Enrolled. These users can be remove by selecting the checkboxes beside their names. If they can be removed, a “Remove User(s)” button will appear at the top of the chart.
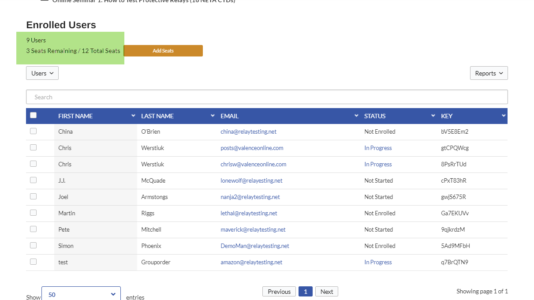
If you click the “Remove User(s)” button, the selected Team Members will be removed and the seat count will increase accordingly. The example group now has three remaining seats after the selected users were removed.
If you want to remove a Team Member that has already started a course, please email store@relaytraining.com with your group name and the Team Members email address and we can remove the user for you. You will not get a seat credit after removing users who have started a course.
How to Add Seats to Your Group
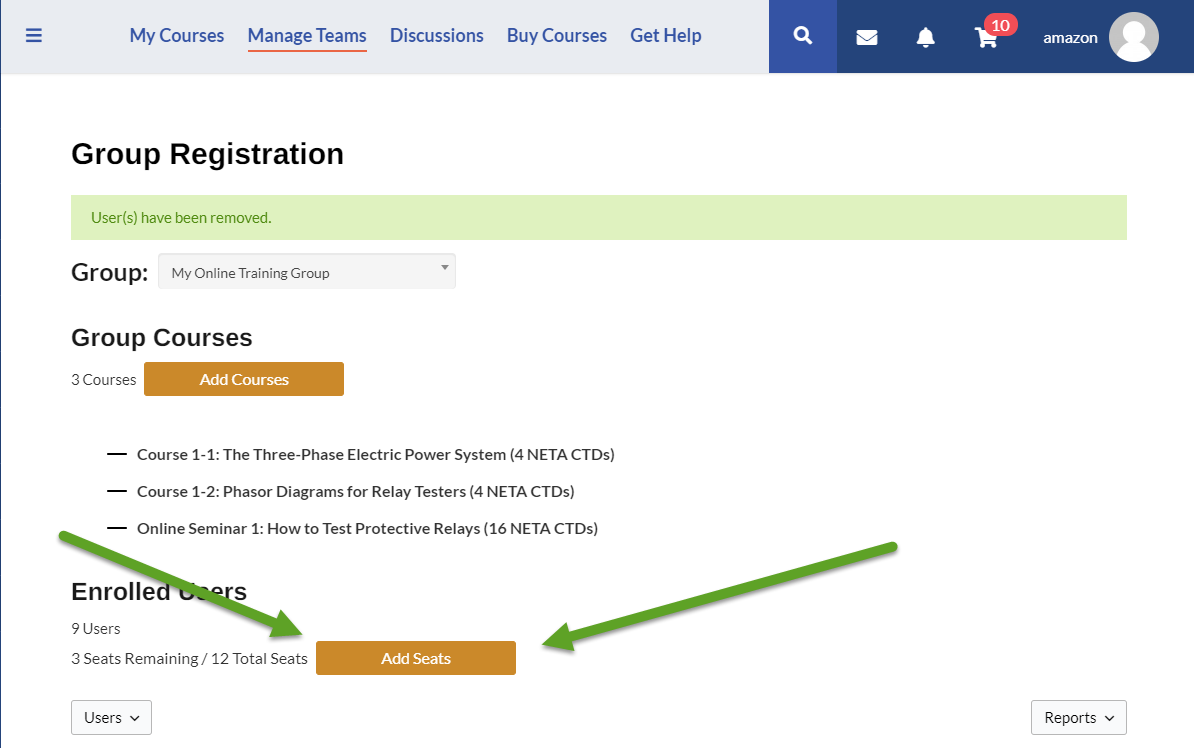
You can easily add seats to your group by selecting the “Add Seats” button just above the Enrolled Users chart on the Manage Teams page.
You will be redirected to an online shopping cart where you can change the number of extra seats you wish to purchase. Notice that the bulk discount and multiple training program is automatically applied on the cart page. When you’ve set the number of seats you wish to purchase, click your preferred payment method as described earlier.
Your additional seats will appear in your group when your payment method is approved.
How to Add Additional Courses to Your Group
You may have purchased a couple of trial courses to see how you liked them, found out how great they are, and want to buy more. Or, you may want to add one of the new training programs we recently released.
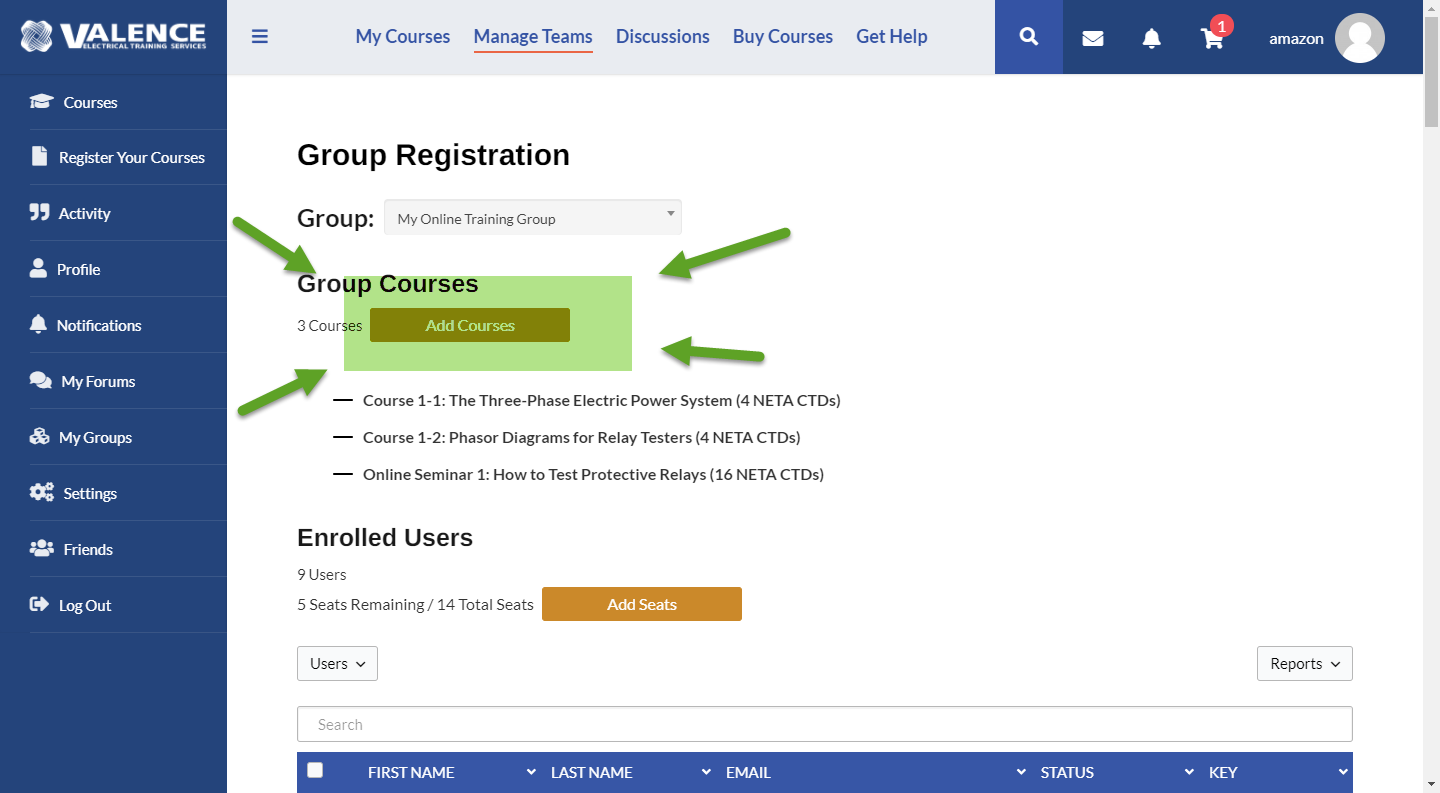
You can easily add courses to your group by selecting the “Add Courses” button at the top of the Manage Teams page.
Click the “DO YOU WANT ONLINE TRAINING FOR A TEAM OR SOMEONE ELSE?” pulldown list to see your options:
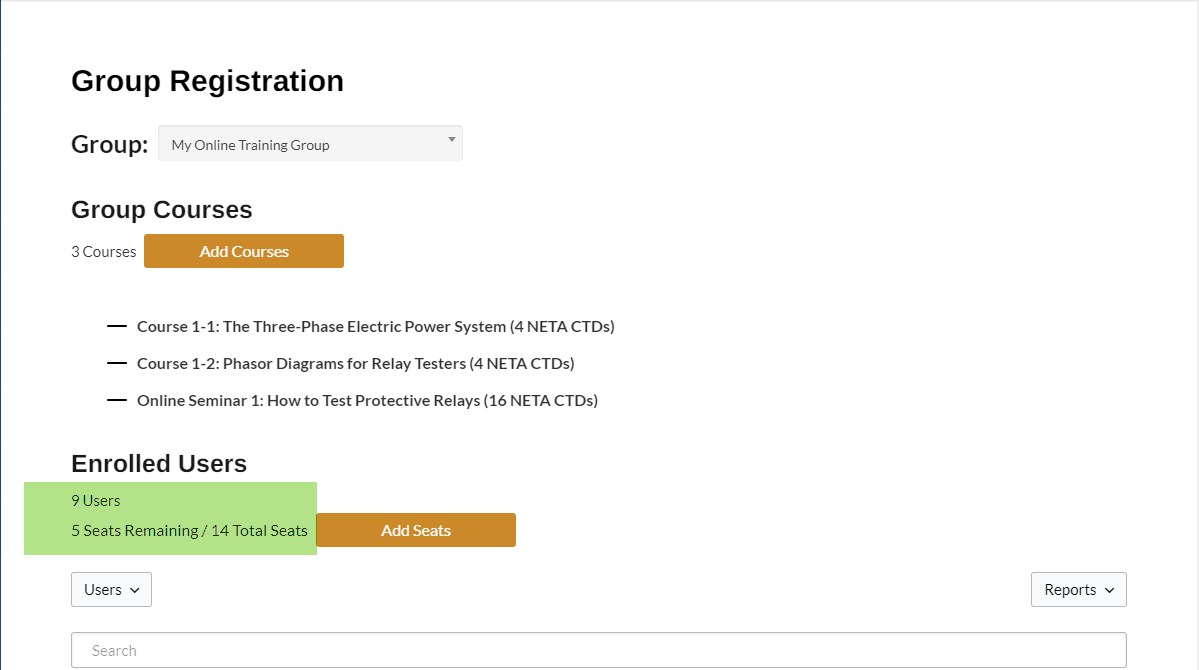
The site will show you the configuration of your existing group. There are 14 seats assigned to three courses in the “My Online Training Group” example, as shown below:
If the group leader in the example wants to add courses, they can select any empty checkbox beside a course description. For example, the group leader in our example can select the “Introduction to Power System Protection (Free)” course because its checkbox was empty in the previous image.
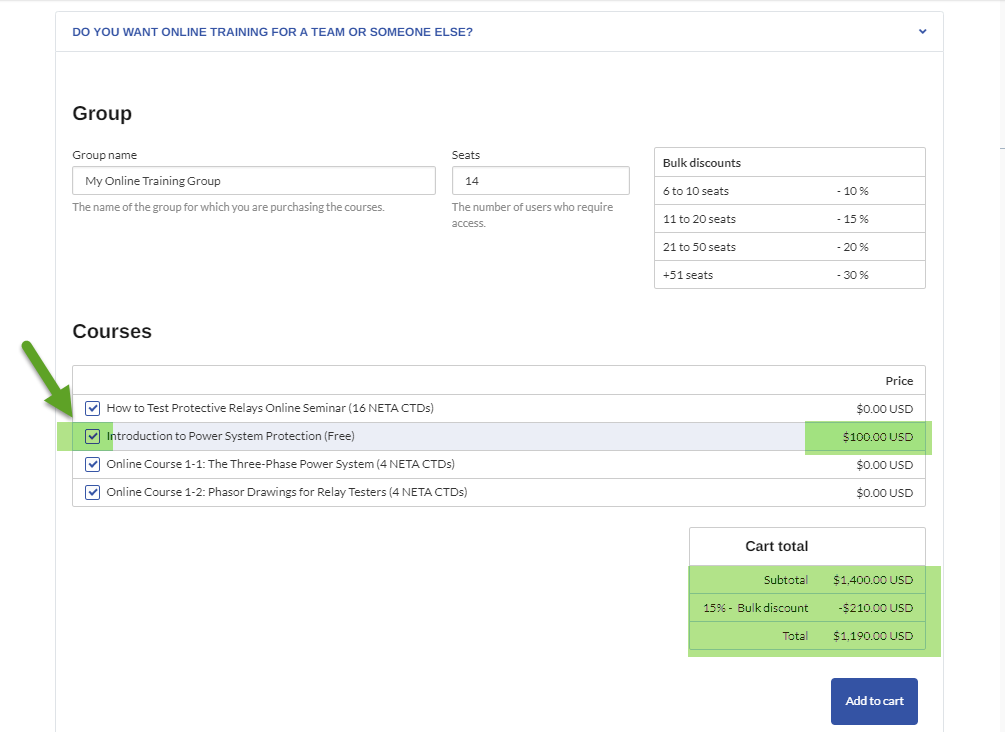
The site automatically added 14 seats for that course to the cart because there are 14 seats in the group. Adding courses will always add that course to every seat in the group. You must create additional groups if you want to mix and match courses and students.
The bulk discount was automatically applied and the group leader can pay for the additional course using any of the payment methods described earlier. All students and seats of the group will be automatically enrolled in the new course when the payment is approved and accepted.
How to Add Group Leaders
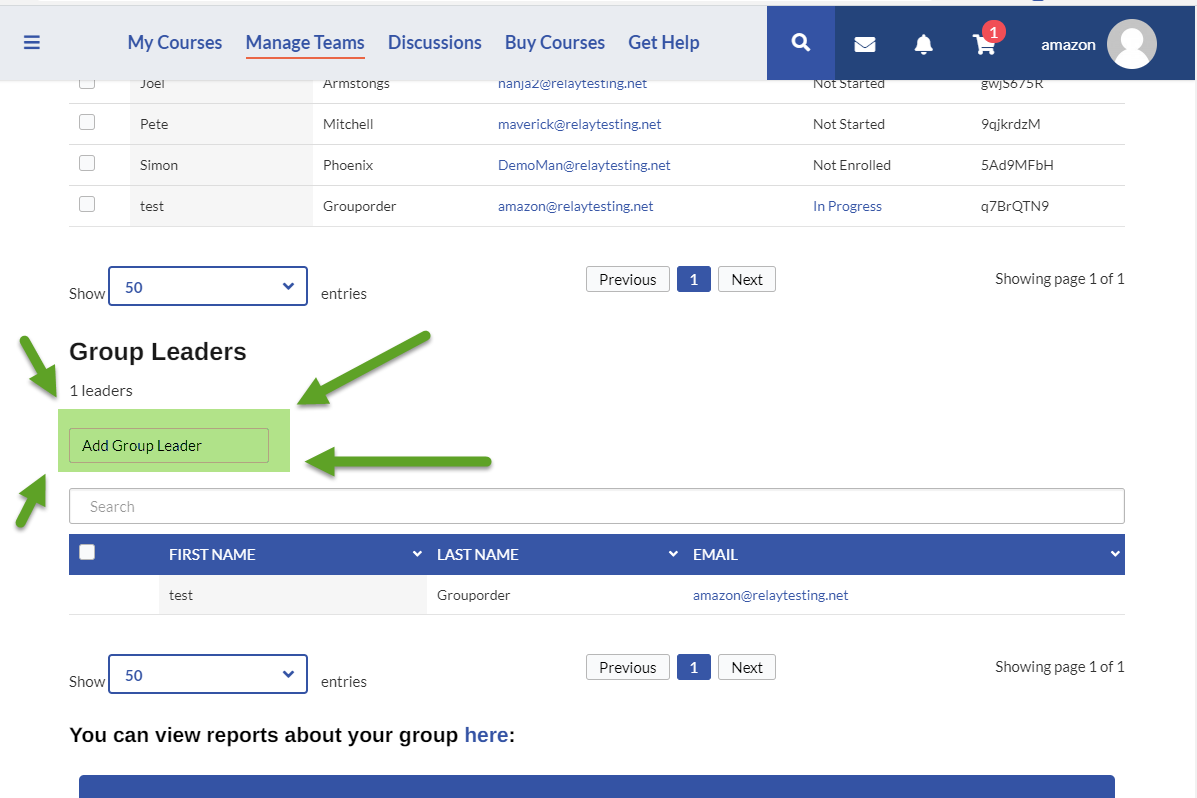
Group Leaders can perform all of the functions described on this page. Every group can have multiple Group Leaders. Any Group Leader can add another Group Leader by scrolling down past the “Enrolled Users” chart on the Manage Teams page to the “Group Leaders” chart and then clicking the “Add Group Leader” button:
A popup dialog will open. Enter the new Group Leader’s First Name, Last Name, and Email Address. The new Group Leader will be added to the chart when the “Add Group Leader” button is selected.
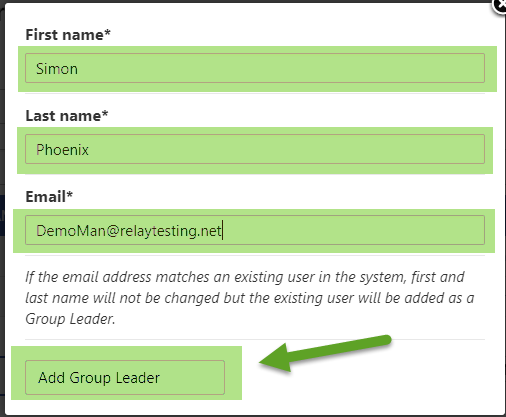
The new Group Leader will be added to the Group leader list and be sent an email with instructions. If they do not have a user account, a new account will be created for them and they will receive an email with their account information.
How to Review Your Team Member's Progress
We have many reporting options available to you.
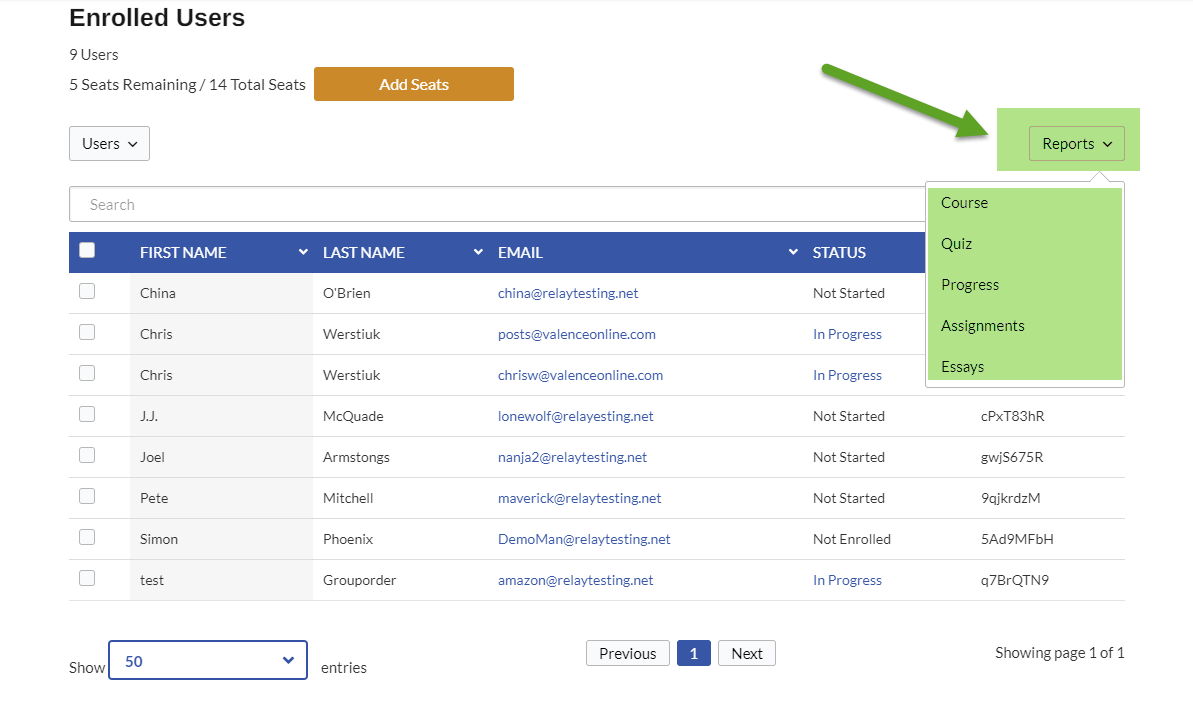
There are some basic reporting features under the “Reports” pull-down list on the Manage Teams page that you can explore:
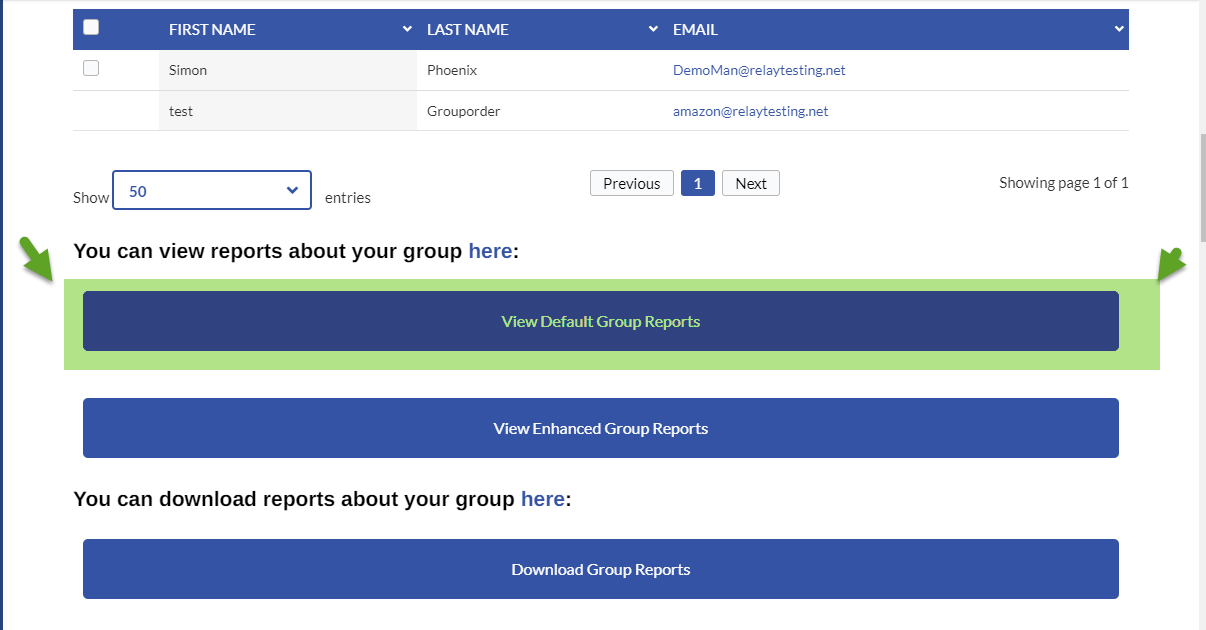
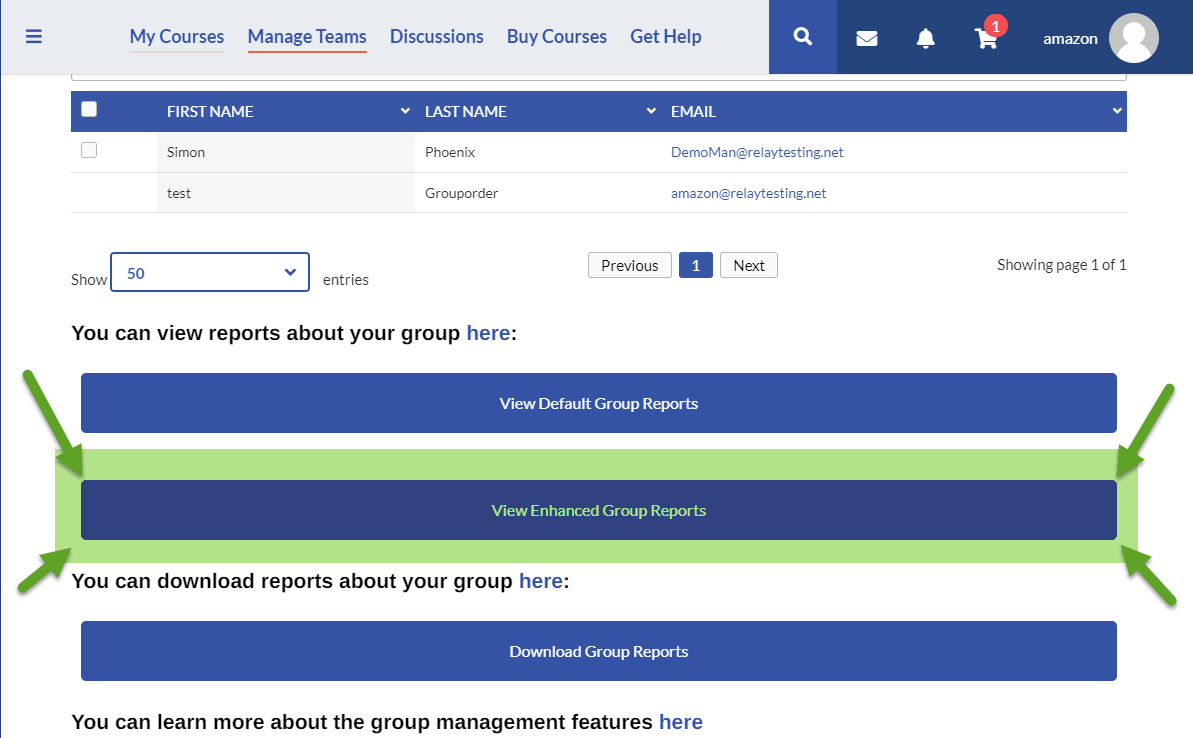
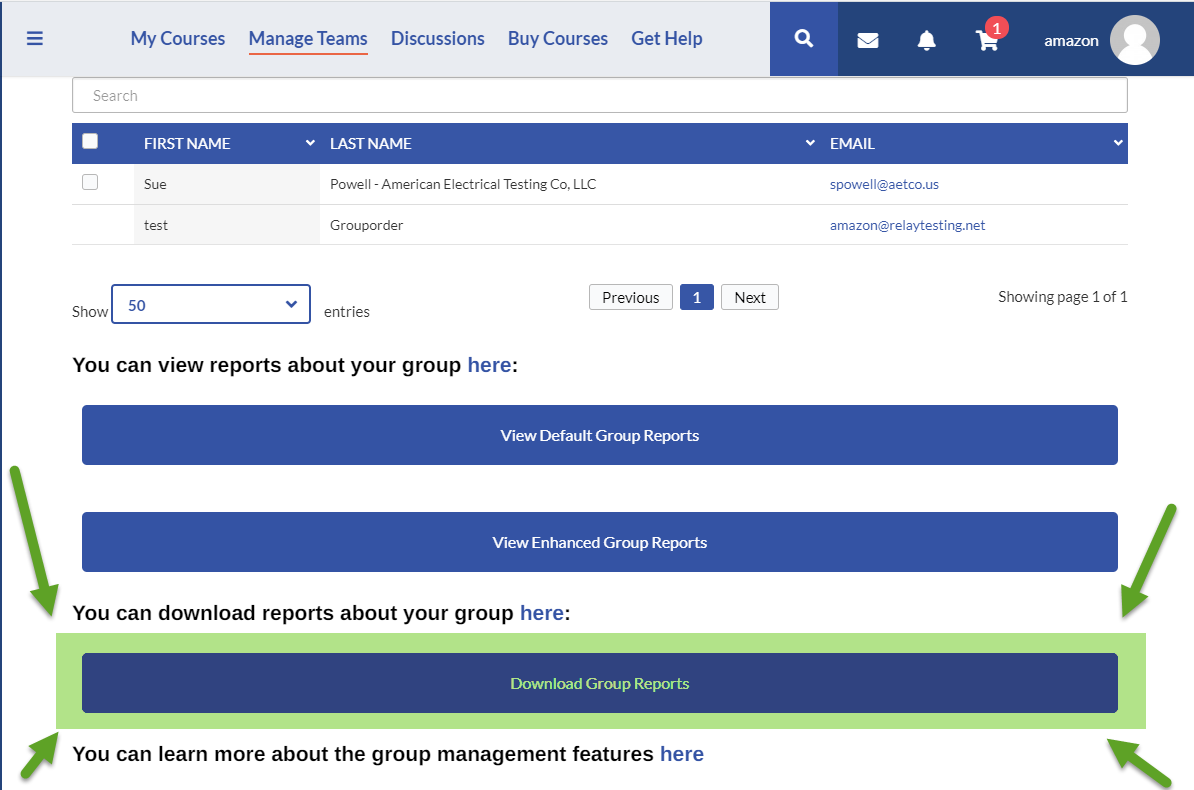
Or you can select the “View Default Group Reports” button below the Group Leader chart to view the basic reporting features that are built in to our learning management system:
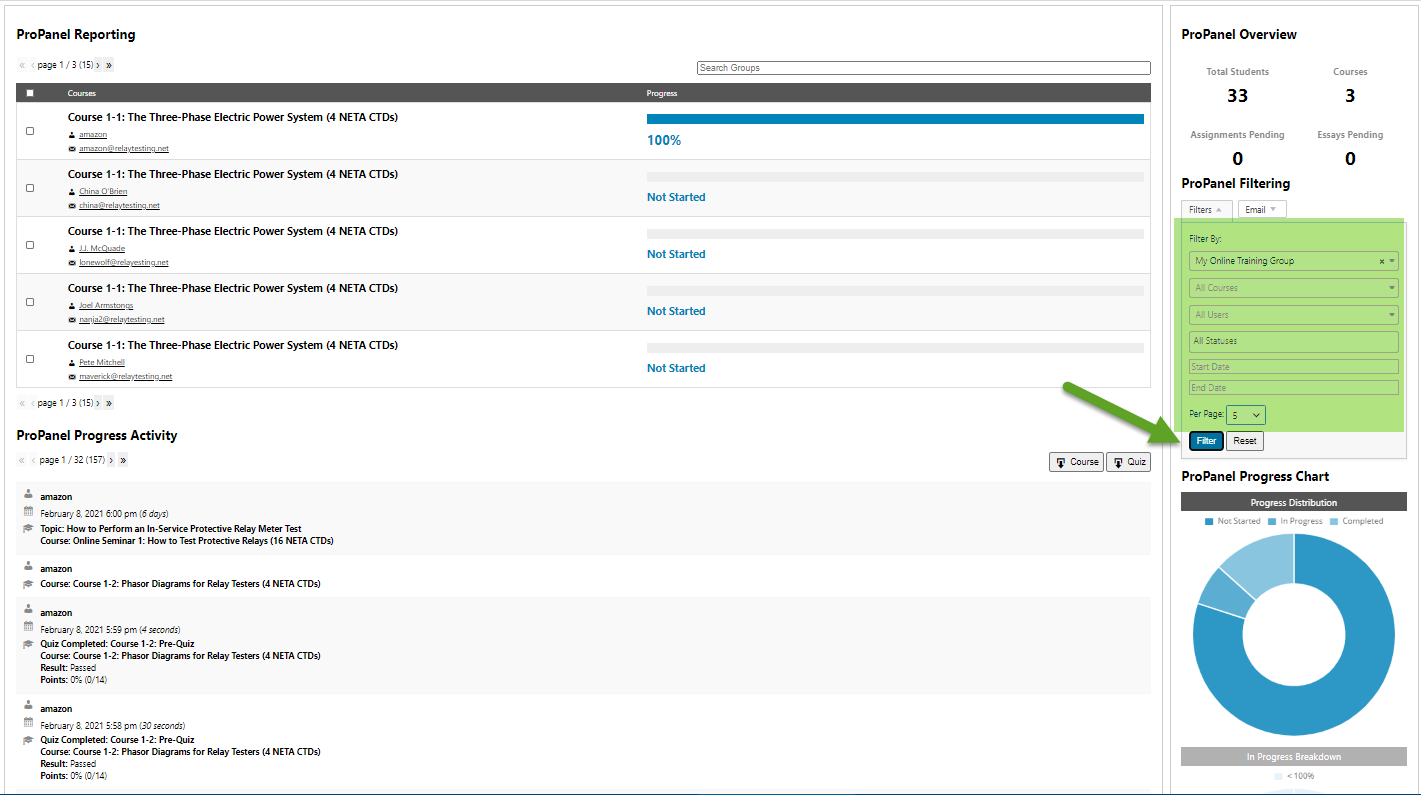
You can explore the available reports by choosing filters on the right hand side of the screen:
However, we recommend that you use the “View Enhanced Group Reports” option:
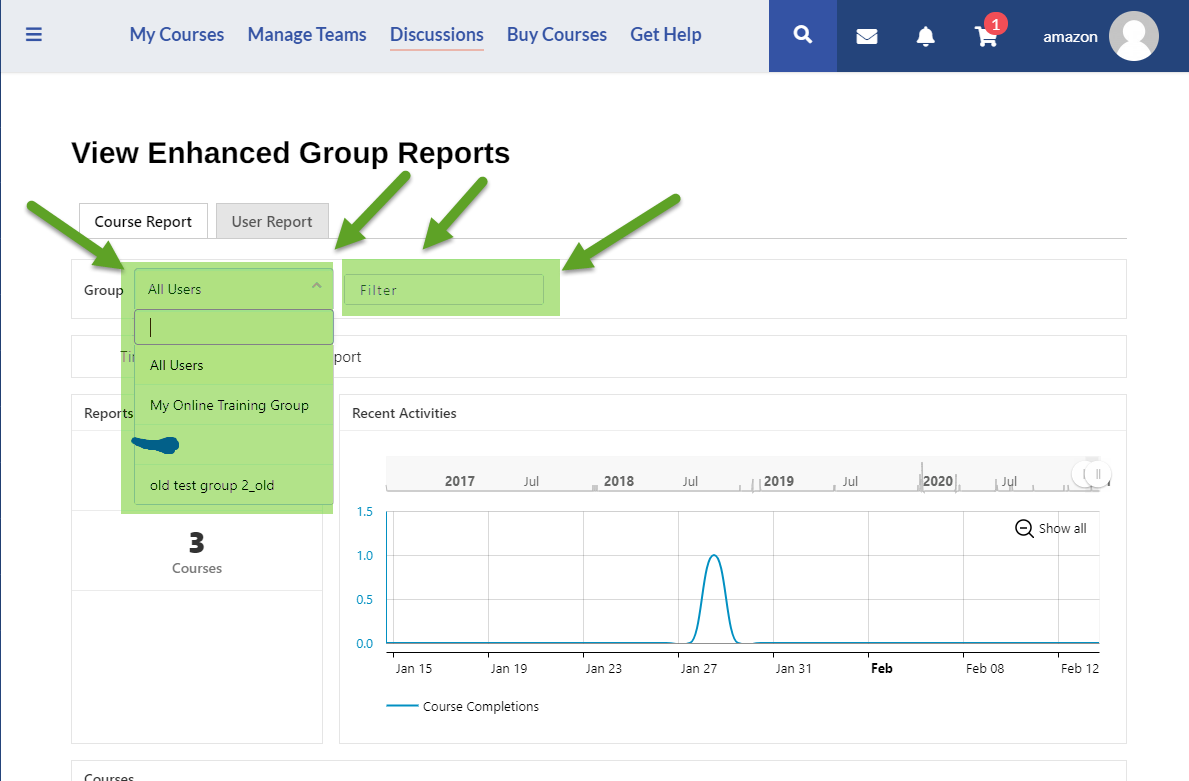
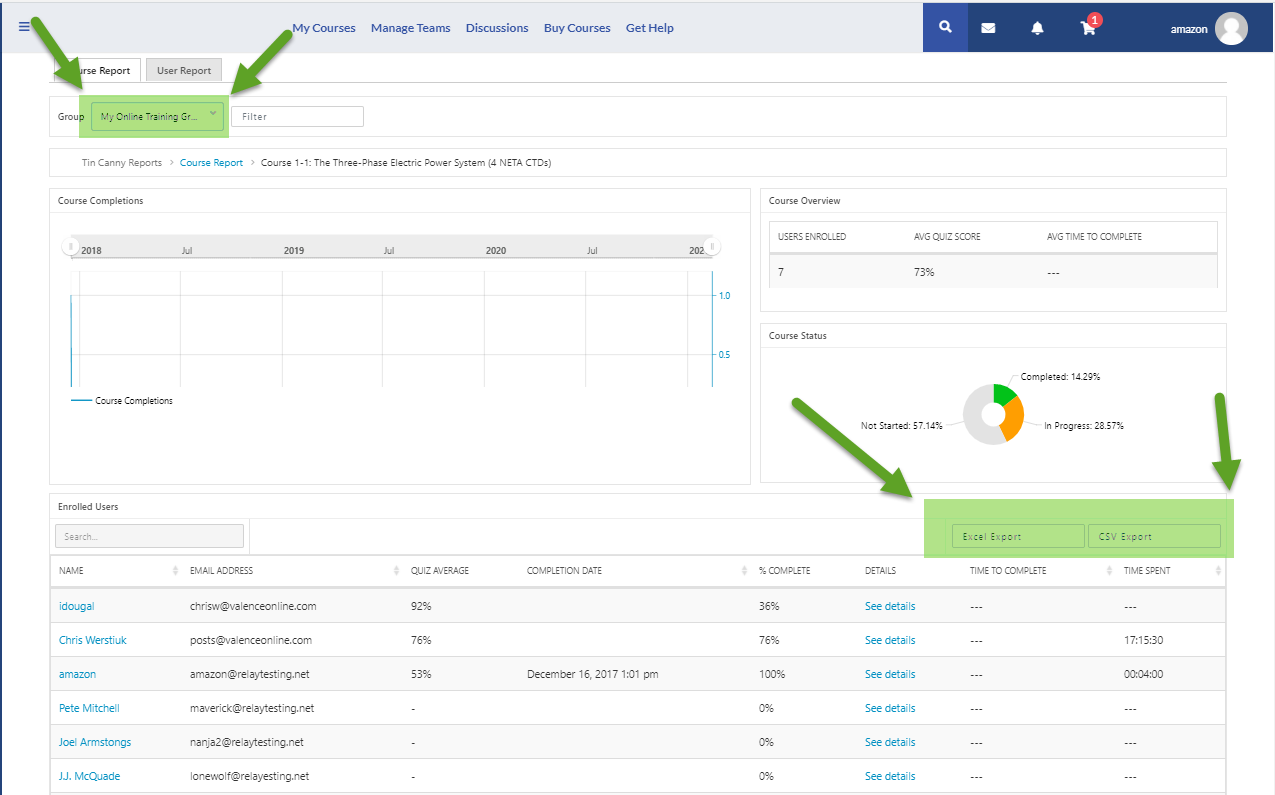
Start by choosing your group via the Group pull-down list and clicking the “Filter” button:
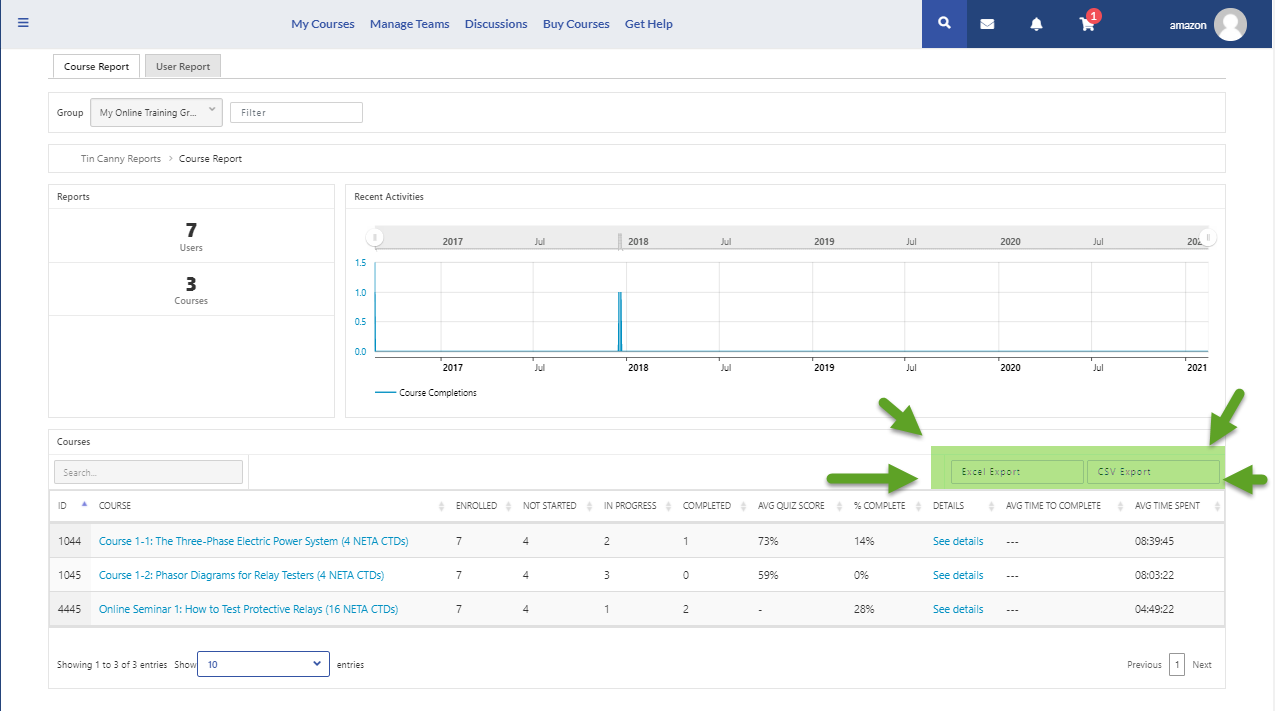
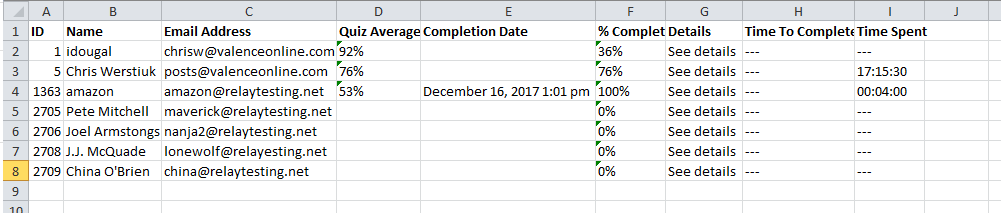
A summary of your group will appear. You can download a report of this activity using the “Excel Export” or “CSV Export” Buttons.

You can drill-down and get more information about individual courses by clicking on a course:
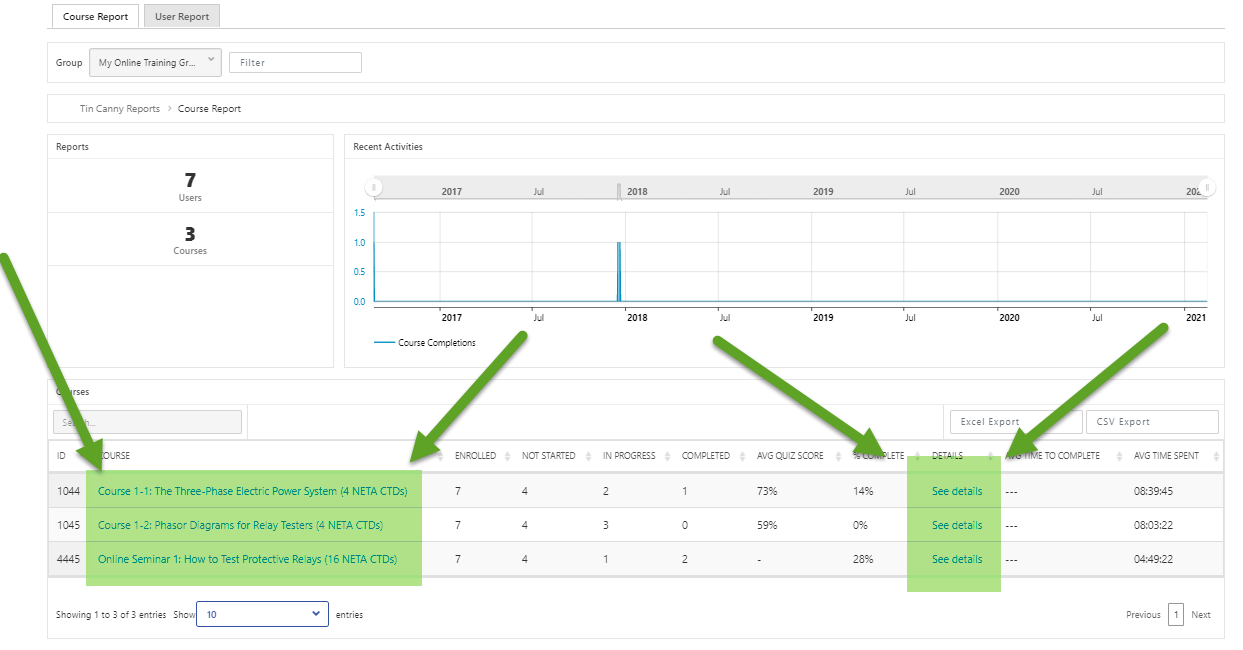
A course detail will appear. Make sure the group you wanted to see is selected at the top of the page. You can download these reports using the “Excel Export” or “CSV Export” Buttons
Download Course Reports
You can download very detailed reports in csv format by clicking the “Download Group Reports” button below the previously described sections:
This will take you to the backend of the site where you have two download choices for each group:
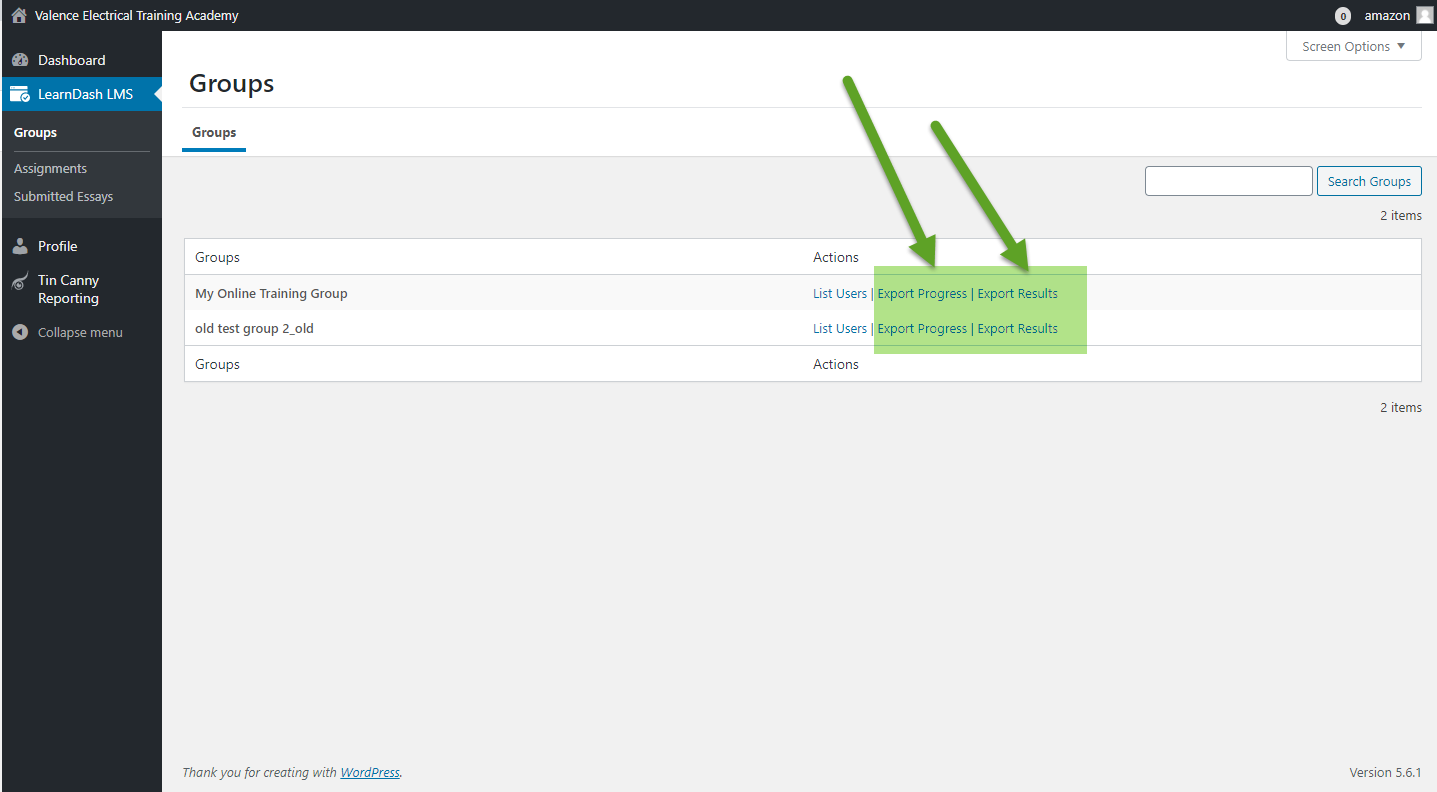
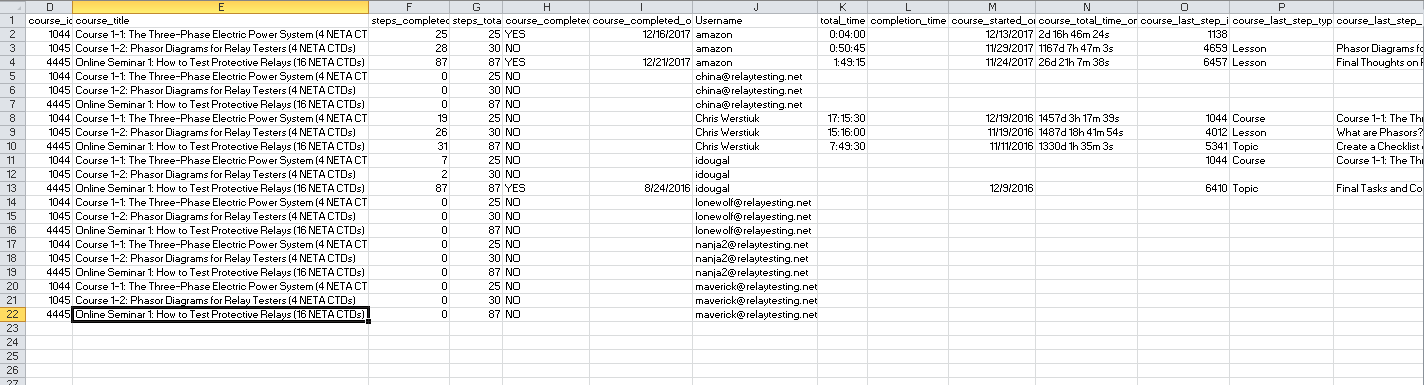
You probably are looking for information from the Export Progress option. A csv file will start downloading when you select the link. You can get the following information that can be filtered, re-arranged, or copied to other reports you need from your company:
- How much progress a Team Member has made in each course.
- How many Team Members have completed courses, by course.
- When courses were started.
- When courses were completed.
- How much time a Team Member spends in each course.
(This information depends on a lot of factors and may not be accurate) - When the Team Member logged on to the training site last.
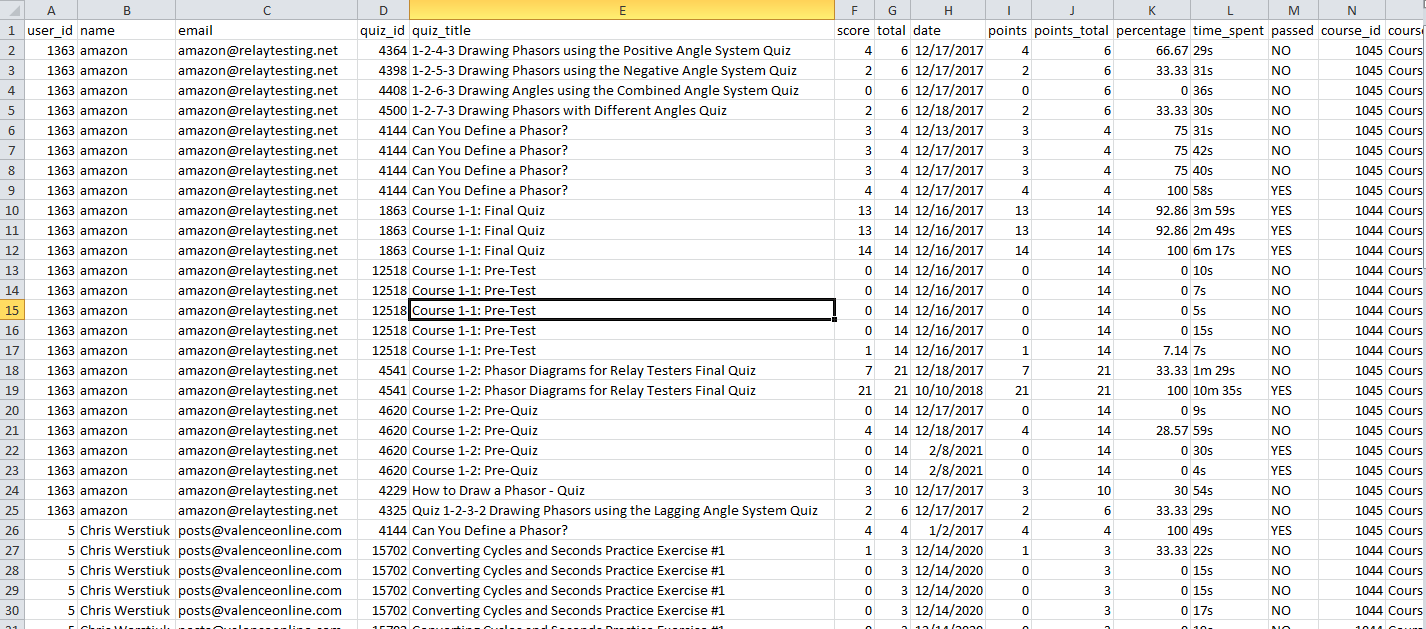
The “Export Results” link will download a csv file containing all of the quiz results from our online training courses. We have pre-quizzes that Team Members take before the course is started that is very similar to the final exam for the course so that you can see how well the Team Member has progressed as they worked through the course.
How to Get Continuing Education Credit Certificates for Team Members
We issue certificates with continuing education credits to Team Members when:
- The final Quiz of an online training course is passed with a score of 80% or higher, or
- All of the topics in an online seminar have been marked complete.
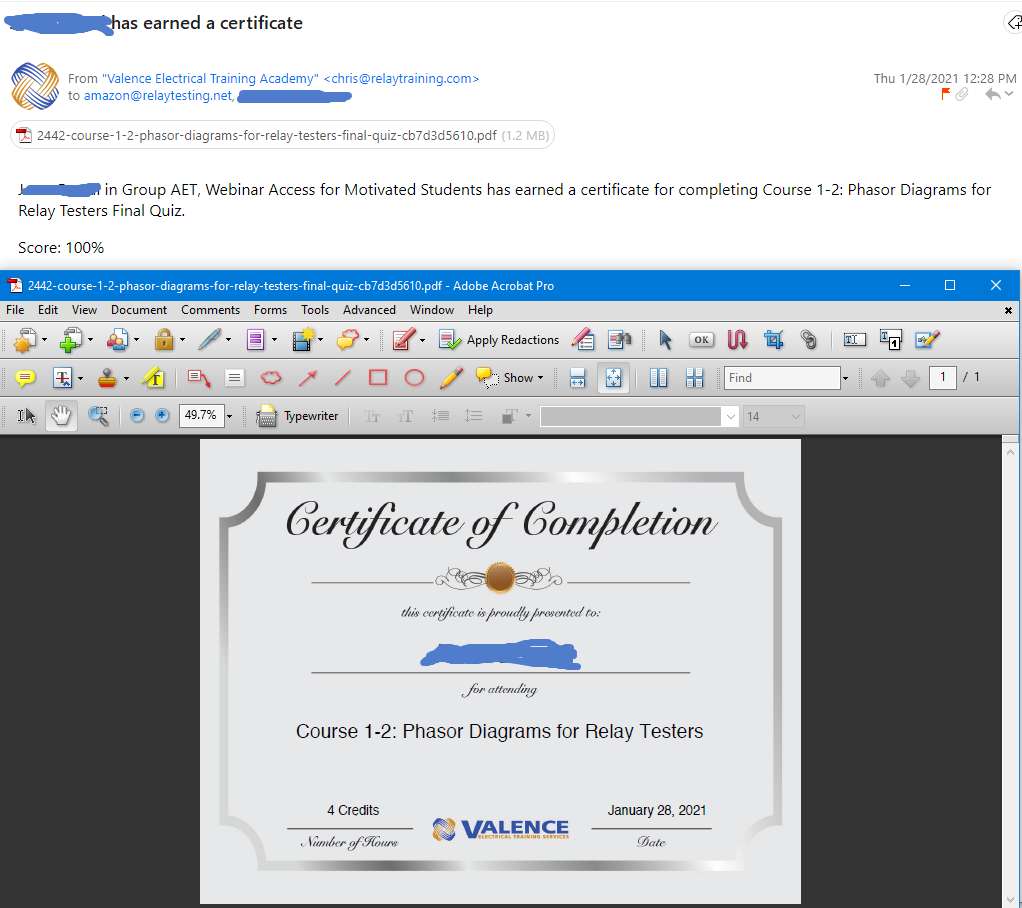
All Group Leaders and your Team Member will receive an email whenever one of your Team Members earns a certificate. You can print, file, and/or report it wherever you need to as per your internal policies.
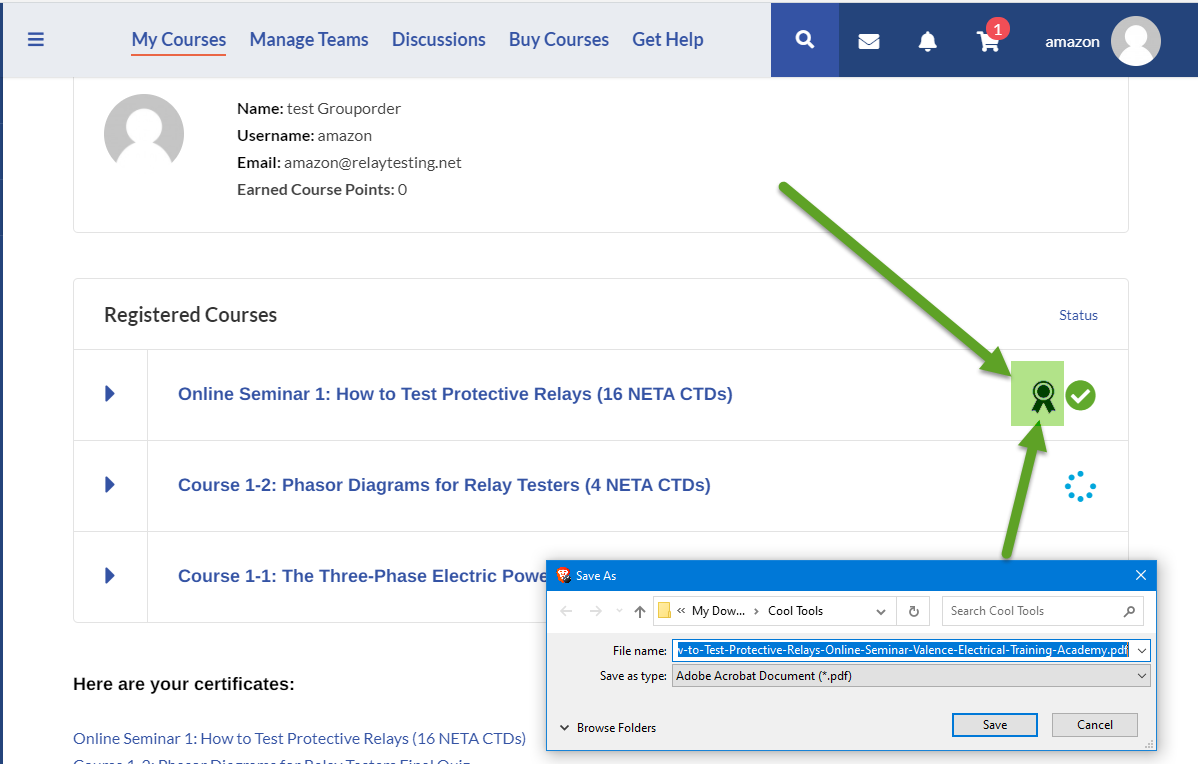
If you cannot find a certificate and need another copy. You can ask the Team Member to go to their My Courses page (https://valence.relaytraining.com/my-courses/).
Certificates for online seminars can be downloaded by right-clicking the certificate symbol beside the “Registered Course” description.
The Certificates for Online Courses are stored with the quiz results, which can be viewed by clicking the expanding arrow on the left-hand side of the course description. The certificate can be saved by right-clicking the certificate symbol beside any quiz result greater than 80% and select save-as.
We hope that this page or the videos on the “Get Help” page answered any question you had about our group management program. Please feel free to contact us at store@relaytraining.com if you have any questions.
We look forward to seeing you and your team in our protective relaying online training courses.