
Are you new to relay testing and want to get a good foundation so that you are ready when you get thrown to the relay testing wolves?
Or have you already been thrown to the wolves and don’t feel confident that you have been testing relays properly?
If so, this seminar covers the basics of overcurrent protection that new relay testers should know before they start testing relays. It will also fill in gaps for self-taught relay testers who had to figure it out for themselves and want to truly understand how to test all overcurrent relays from any manufacturer with any test-set.
This seminar starts at the very beginning by defining the basic operating characteristics that you will find in all relays to help you understand why techs test relays the way they do and what failure points you should be looking for inside the relays you test. All overcurrent relays are fed from current transformers (CTs), so we also explain how CTs operate, why a saturated CT is bad, and how you can check to make sure that the CTs are properly installed on the power system.
Electro-mechanical relays were the backbone of the power system for over a century and are a great teaching tool because you can see what’s happening inside the relay while you are testing it. Most digital overcurrent relay elements are really just modeling electro-mechanical overcurrent relays, so being able to test and visualize an electro-mechanical relay will help you test any relay. Therefore, the second lesson shows you how to test electro-mechanical overcurrent relays, which sets you up with the basic skills and understanding that you can use for all relay testing.
I thought this was going to be a nice short lesson, but we want to fill in all of the blanks in your relay testing knowledge. That means that we explain every step of the relay testing process. For example; we don’t just don’t tell you to parallel channels when your test-set amplifiers overload, we explain why your amplifiers are overloading and what happens when you parallel channels…and why paralleling too many channels can actually make the problem worse. We spend a lot of time explaining the why of relay testing techniques so that you can apply the correct test procedure when something goes wrong. Then we go through step-by-step procedures with multiple relay and test-set examples that will prepare you to test your relays with your test-sets. You can download test sheets, checklists, and detailed testing instructions that you can use at your site to make sure you are testing your electro-mechanical relays correctly.
The third lesson describes the most common kinds of power system faults so that you can troubleshoot problems after a relay operates…and apply realistic fault simulations with your electro-mechanical relay testing techniques to test any relay with any test-set.
The fourth lesson will show you how the skills you learned in the electro-mechanical lesson can be applied to any relay using a simple digital overcurrent relay (i.e. Basler BE1-51) example. Digital relays have different failure points, so we explain why you need to modify the electro-mechanical test procedures slightly when testing single-function, multi-phase, simple digital relays. Then we show you step-by-step test procedures using multiple test-sets along with test sheets, checklists, and detailed testing instructions that you can download and use at your site.
We strongly believe that if you truly understand the theory of a topic, you will be a better relay tester. The fifth lesson will give you a peak behind the curtain and shows you how a relay engineer uses engineering studies to create relay settings, which will help you understand what you are testing and find setting mistakes, which are the most common reasons why relays mis-operate when in-service. We also show you how to search through a coordination study to find the relay settings and create test points that make sure the correct settings have been applied the easy way without needing to decode digital relays settings.
In the final lesson, we discuss why modern relays should really be called intelligent electronic devices (IEDs). These “relays” may share some features with traditional overcurrent relays, but they are much more complicated and have significantly different failure points. Traditional test techniques simply aren’t designed to find the most common problems inside IEDs, but we show you how to take all of the knowledge and techniques learned in this seminar and apply them to IEDs with the updated overcurrent element testing plan described in this lesson. As usual, there are step-by-step test procedures using multiple test-sets along with test sheets, checklists, and detailed testing instructions that you can download and use at your site to test the overcurrent elements inside this seminar.
How it Works:
This online seminar contains over 30 hours of videos (usually less than 15 minutes each) that you can watch at your own pace in any order with an internet connection. When you purchase the seminar with your credit card, you will have unlimited, 24/7 access to all the videos with no expiration date. Each video has closed captioning, fast-forward/rewind/play speed controls, and you can revisit the videos whenever you wish. We try to follow a “show don’t tell” philosophy in all our videos and use realistic conditions as much as possible. This seminar isn’t just a bunch of pre-recorded webinars and power point slide presentations. You will watch the instructor test different relays with different test-sets and explain what he is doing every step of the way. We didn’t cut out the mistakes he made while testing and creating the settings, so you will also see how to troubleshoot problems when they happen.
Continuing Education Credits
You will get a certificate of achievement when you complete all of the topics and lessons in the seminar that you can use for continuing education credits with your organization. Please let us know if you need any help getting accreditation with your organization. We will do the best we can to help you.
This course is eligible for 32 NETA Continuing Technical Development Credits (CTDs). NETA Certified Technicians (Level III and Level IV) are required to earn a minimum of 48 CTDs every three years to maintain their certification. For more information about the CTD program and requirements, please contact the NETA office at neta@netaworld.org or 888-300-6382.
What’s in the Seminar
Click on any lesson to see what topics are included in that lesson:
Lesson 1: Introduction to Protective Relays
- History of Electrical Protection
- What Are Relays For?
- Introduction to Relay Inputs
- Introduction to Current Transformer (CT) Theory
- Introduction to Current Transformer Saturation
- Current Transformer Nameplate and Specifications
- CT Nameplate Burden and Saturation Voltage
- How Relays Protect Equipment
- How Relays Ignore System Fluctuations
- How Overcurrent Relays Coordinate
- Introduction to Zones of Protection
- Relay Output Basics
Lesson 2: How to Test Electro-Mechanical (E-M) Overcurrent Relays
- Electro-Mechanical Relay Basics
- Take a Tour of E-M Relay Components
- What to Look for in the E-M Relay’s Instruction Manual
- Test-Set Current Channels – Current & VA Specifications
- Test-Set Current Channels – Voltage Requirements
- Test-Set Current Channel Capabilities
- Configuring Test-Set Current Channels for Different Relays and Taps
- How to Connect Test-Set Current Channels to the Relay
- How to Make Test-Set to Relay Sensing Connections
- How to Connect to the Relay
- How to Connect Your Test-Set to the Relay
- How Not to Perform a Pickup Test
- How to Choose the Correct Step Size
- How to Perform an E-M Relay Pickup Test
- How to Evaluate Your Pickup Test Results With % Error
- Why You Can’t Always Use Percent Error Tolerances
- How to Apply Tolerances to Test-Set Software
- How to Apply Percent Tolerances to Test-Set Software When the Expected Value Is 0
- How to Perform a Manual E-M Pickup Test
- How to Perform an Automated E-M Pickup Test
- How to Adjust E-M Inverse-Overcurrent Relay Pickups
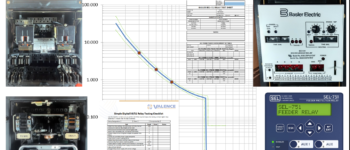
- What Are TCC Curves and Why Do They Matter?
- How to Determine Test Points and Time Delays
- How to Prepare for 51-Element Time Tests
- How to Perform Manual 51-Element Time Tests
- How to Perform Simple 51-Element Time Tests
- How to Perform 51-Element Time Tests Using Curves
- How to Perform 51-Element Time Tests Using States
- How to Adjust the Timing on an E-M Relay
- Introduction to E-M 50-Elements
- How to Perform a 50-Element Pickup Test
- How to Perform a Manual 50-Element Pickup Test
- How to Perform a 50-Element Pickup Test
- How to Adjust a 50-Element Pickup on an E-M Relay
- How to Perform a Dynamic 50-Element Pickup Test
- Introduction to Electro-Mechanical Targets
- How to Test Electro-Mechanical Relay Targets
- How to Use a Test-Set to Test E-M Targets
- How to Manually Test E-M Targets With Your Test-Set
- How to Test E-M Targets With Your Test-Set
- How to Test E-M Relays Using Pre-Built Test Plans
- How to Inspect the Cover and Case
- How to Perform a Mechanical Inspection of the Relay
- How to Inspect the Relay’s Contacts
- How to Perform a Creep Test
- How to Perform a Mechanical Zero Test
- How to Perform an Insulation Resistance Test
- How to Verify the Relay’s Trip Circuit (NERC)
- How to Safely Put the Relay Back Into Service
- How to Verify the In-Service Relay Inputs (NERC)
- Are Electro-Mechanical Relay Testing Myths True?
- Putting It All Together – How to Test an Electro-Mechanical Overcurrent Relay From Start to Finish
- All the Extras – Downloads and More Training Options
Lesson 3: Understanding Power System Faults
- Overcurrent Relays Under Normal Conditions
- What Happens During a Fault
- Fault Voltage and Fault Current During 3-Phase Faults
- How E-M Overcurrent Relays Respond to 3-Phase Faults
- Fault Current Magnitude and Direction in P-P Faults
- Fault Current vs. Phase Current in P-P Faults
- Fault Voltages in Phase-to-Phase Faults
- What Phase Voltages Look Like During P-P Faults
- Fault Voltages and Fault Current in Phase-Phase Faults
- How E-M OC Relays Respond to P-P Faults
- Fault Voltage and Fault Current in P-N Faults
- How E-M OC Relays Respond to P-N Faults
- Benefits of E-M OC Relays
- What Faults Really Look Like
- Applying Realistic Faults When Testing Relays
Lesson 4: How to Test Simple Digital Overcurrent (SDO) Relays
- Introduction to Simple Digital Overcurrent Relays
- How to Prepare to Test a Simple Digital Overcurrent Relay
- How to Prepare to Test an SDO Relay With Your Test-Set
- How to Connect to a Simple Digital Overcurrent Relay
- How to Connect an SDO Relay to Your Test-Set
- How to Configure Inputs When Testing Digital Relays
- How to Create a 51-Pickup Test Plan for an SDO Relay
- How to Perform Manual Pickup Tests on an SDO Relay
- How to Adjust the 51-Pickup on an SDO Relay
- How to Perform a Ramping 51-Pickup Test on a Simple Digital Overcurrent Relay With Your Test-Set
- How to Create a 51-Timing Test Plan for an SDO Relay
- How to Perform 51-Timing Tests on an SDO Relay
- How to Perform 51-Timing Tests on a Simple Digital Overcurrent Relay With Your Test-Set
- How to Create a 50-Pickup Test Plan for an SDO Relay
- How to Adjust the 50-Pickup on an SDO Relay
- How to Perform a 50-Pickup Test on a Simple Digital Overcurrent Relay With Your Test-Set
- How to Verify the Outputs on an SDO Relay
- How to Verify the Targets on an SDO Relay
- How to Put the SDO Relay Back Into Service
- How to Verify the Trip Circuit Connected to an SDO Relay
- How to Verify the In-Service Relay Inputs Connected to a Simple Digital Overcurrent Relay
- Putting It All Together
- Putting It All Together With Your Test-Set
- All the Extras – Downloads and Additional Training
Lesson 5: Introduction to the Power System Studies Used to Create Relay Settings
- Introduction to Power System Study Single Line Drawings
- Introduction to Load Flow Studies
- How to Calculate the Maximum Fault Current Using An Infinite Buss
- How Does the System MVA Affect the Fault Voltage and Current in a System
- How Does an Impedance Affect the Fault Voltage and Current in a System
- How Does a Connected Motor Affect the Fault Voltage and Current in a System
- Introduction to Short Circuit Studies
- Introduction to Time Coordination Curves for Relays
- Introduction to Time Coordination Curves for Cables
- Introduction to Time Coordination Curves for Transformers
- Introduction to Time Coordination Curves (TCCs) Through Transformers
- Introduction to Time Coordination Curves for Motors
- How Motors Affect Non-Motor Relay Coordination
- Introduction to Arc Flash
- How Relay Settings Affect Arc Flash
- How to Get Time Test Values From a TCC Chart
- How to Get Time Test Values From a Coordination Study
- All the Extras – Downloads and Additional Training
Lesson 6: How to Test Overcurrent (50/51) Elements in IEDs
- What You Need to Test 50/51 Elements Inside an IED
- How You Should Test the 50/51 Elements Inside an IED
- How to Prepare to Test the 50/51 Elements Inside an IED
- How to Test the Phase 50/51 Elements Inside an IED
- How to Test the Ground 50/51 Elements Inside an IED
- How to Test the Electro-Mechanical Reset Overcurrent Elements Inside an IED
- How to Review and Report Your 50/51 Element IED Tests
- How to Test the 50/51 Elements Inside an IED
- All the Extras – Downloads and Training Options
What are you waiting for?
We can’t stress enough that this is everything we know about testing overcurrent relays and overcurrent elements inside IEDs.


Protective Relay Training Class/Course Evaluation Form –
Do it
John AETCO –
Worth the time and money
Protective Relay Training Class/Course Evaluation Form –
Take it, well worth it.